We use cookies and analytics tools to enhance your browsing experience and help us understand how our site is used. By clicking “Accept,” you agree to the use of both cookies and analytics tracking. You can withdraw your consent at any time by clearing your cookies for this site.
Accurate LiDAR scanning on site & precise floor plans in the browser
MAVO 3D & Pointorama
From iPhone & iPad Pro LiDAR reality capture to finished floor plans.
Scan the as-built on site and upload directly to Pointorama. Back at the office, your team picks it up, no file conversion, no software setup.
Assisted drawing tools help working fast without losing precision. All in one combined straightforward workflow.
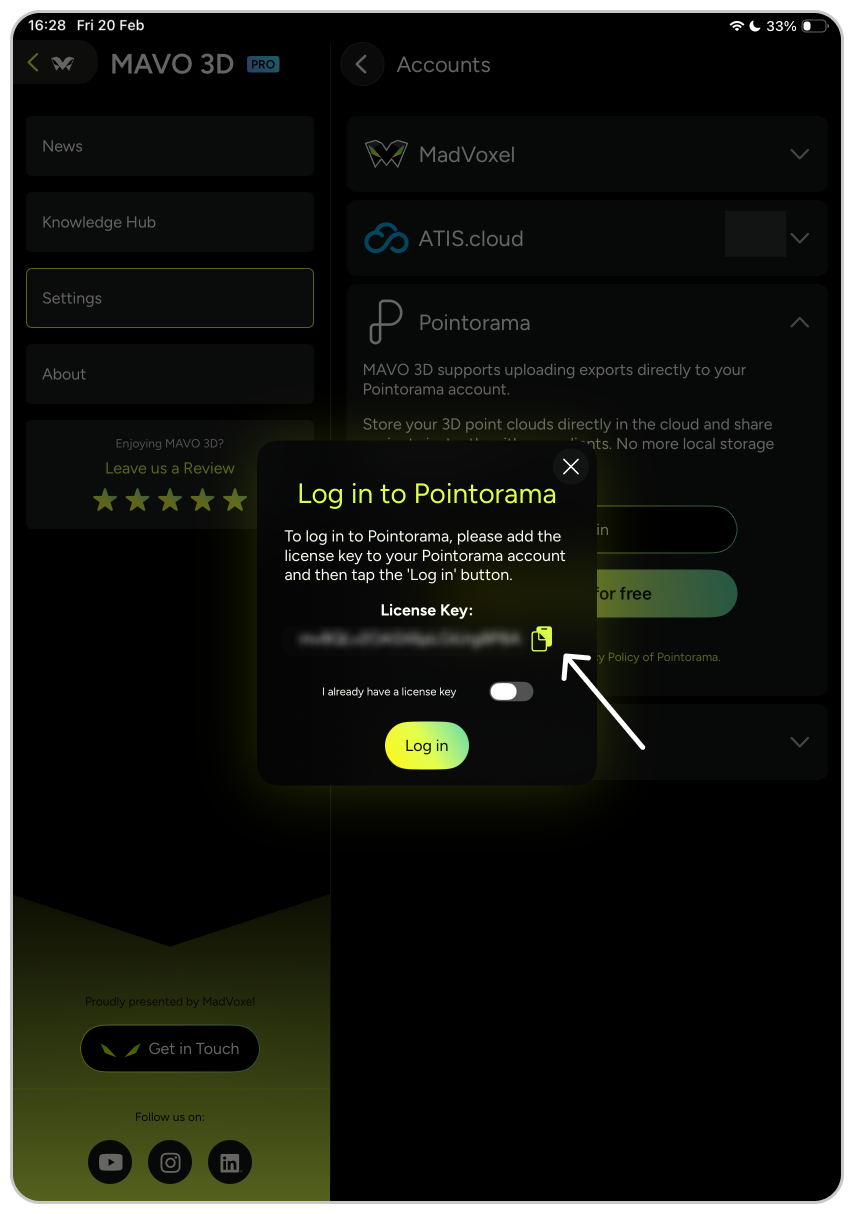
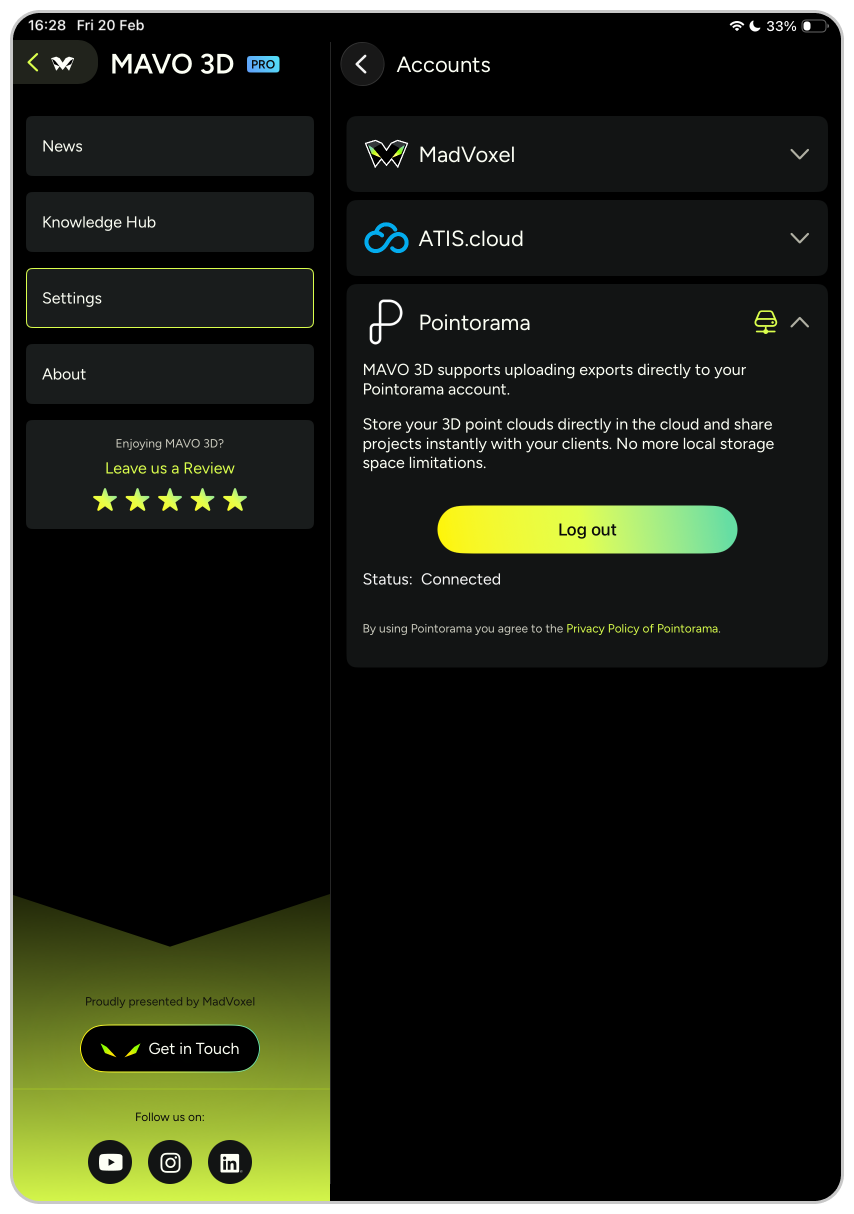
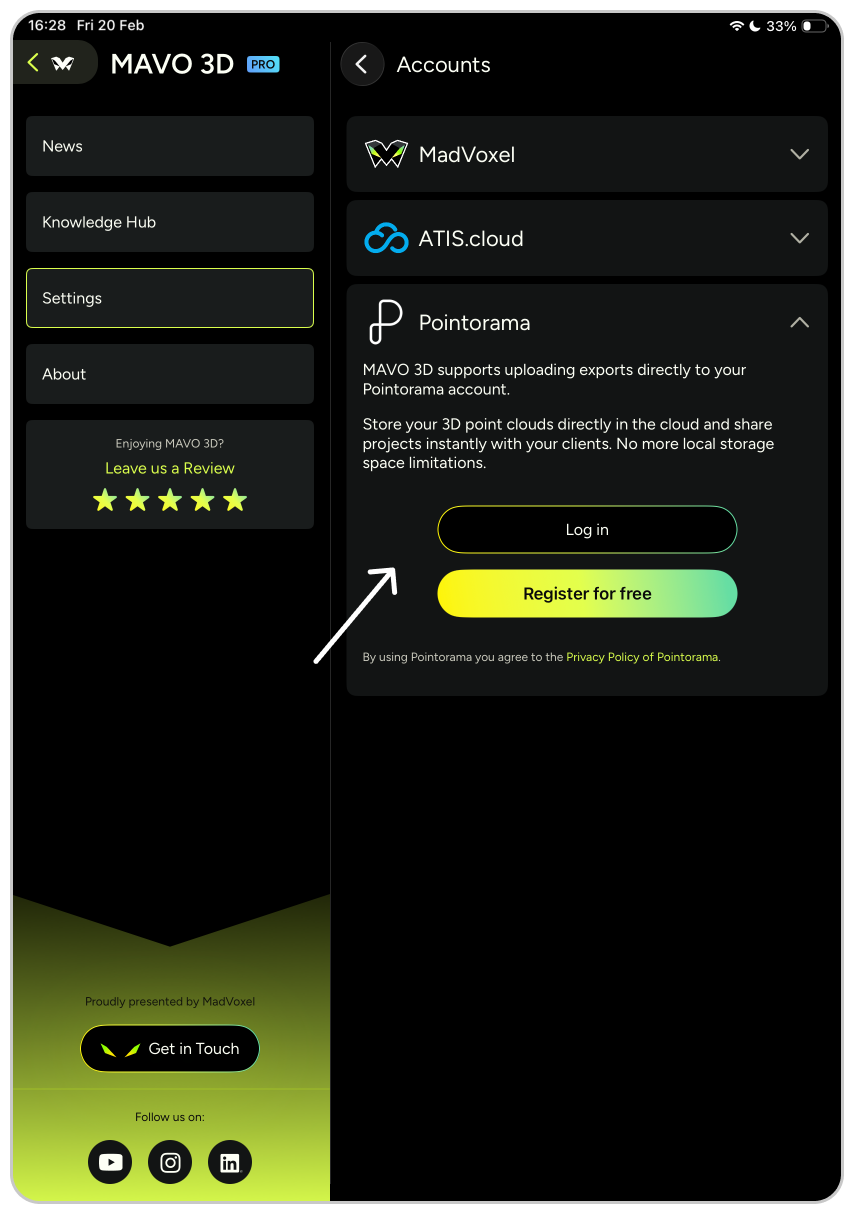
For connecting MAVO 3D to your Pointorama account you have 2 options:
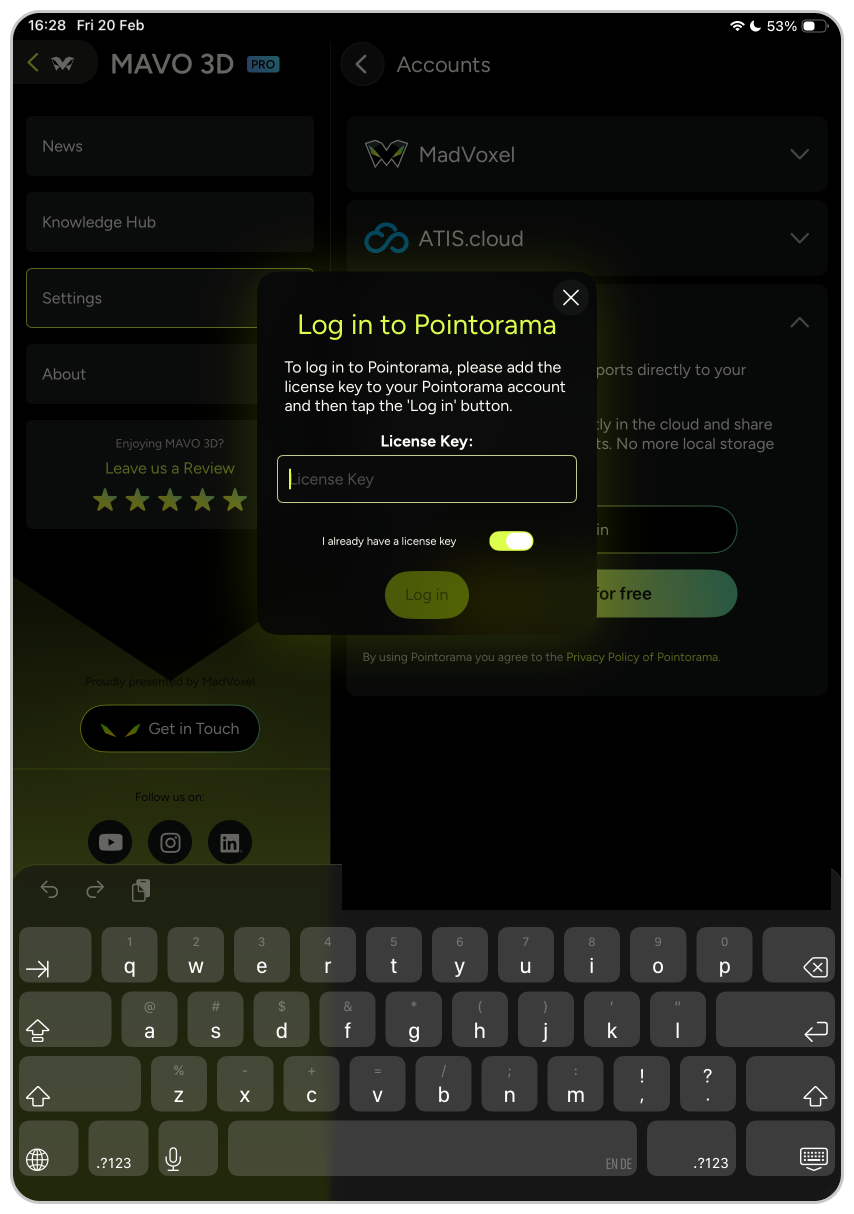
Option A: Start in MAVO 3D, go to “Accounts and Clouds” and copy your MAVO 3D license key. Switch to your Pointorama account and create a new API key by entering your MAVO 3D key.
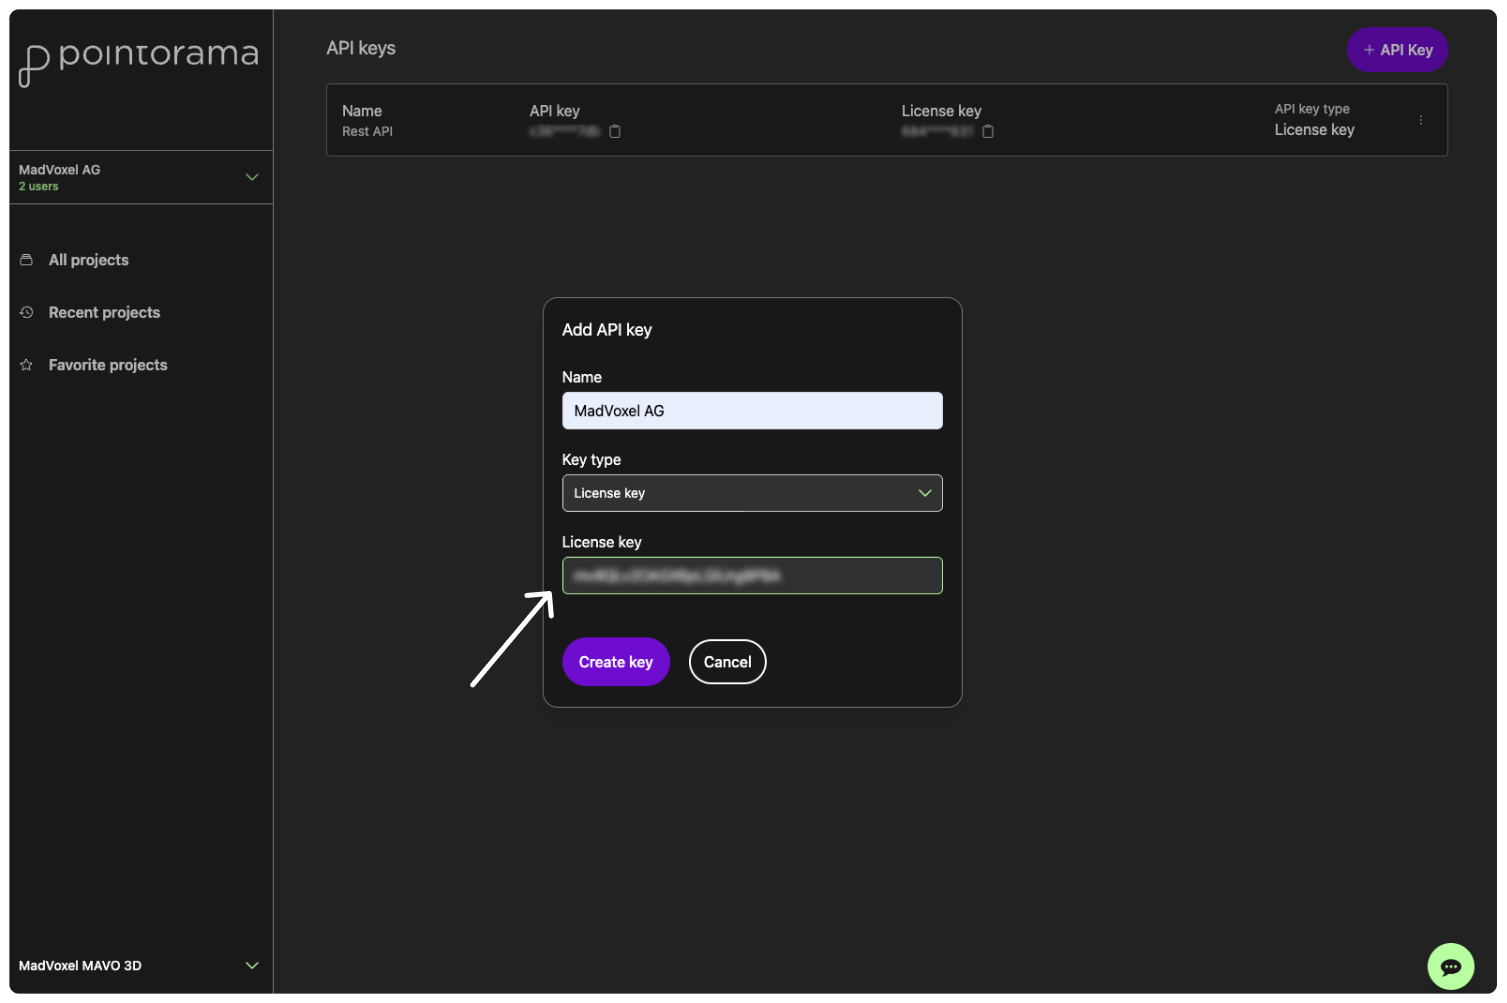
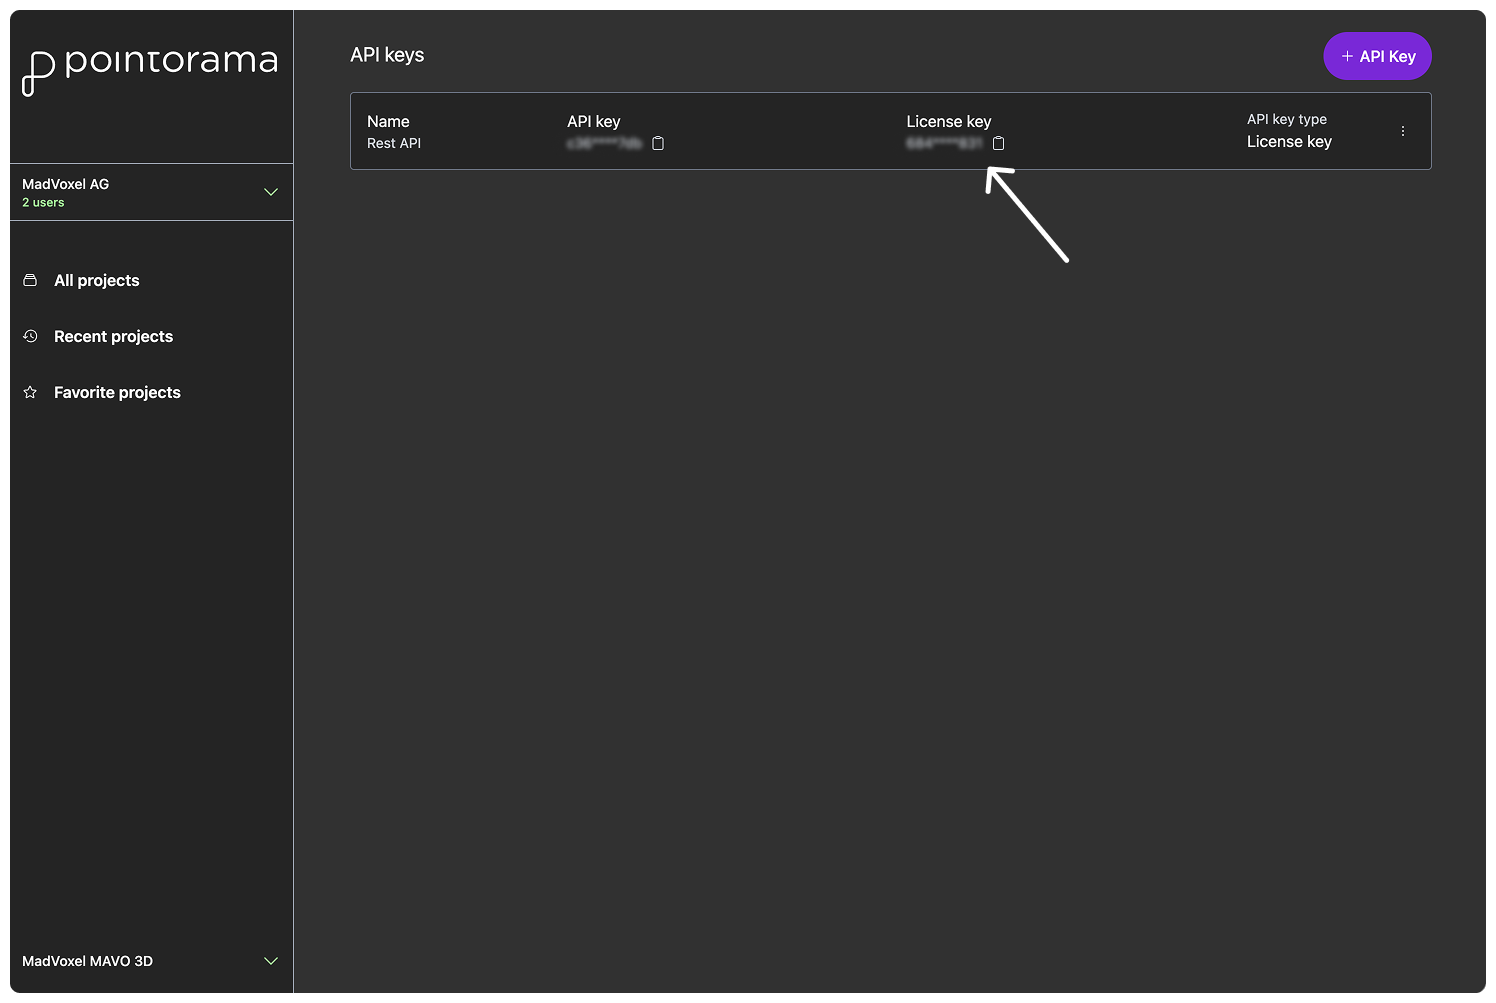
Option B: Copy the license key from the API page in your Pointorama account and enter in MAVO 3D
Both options work similarly. New to Pointorama? Get started right away with your
14-day free trial.
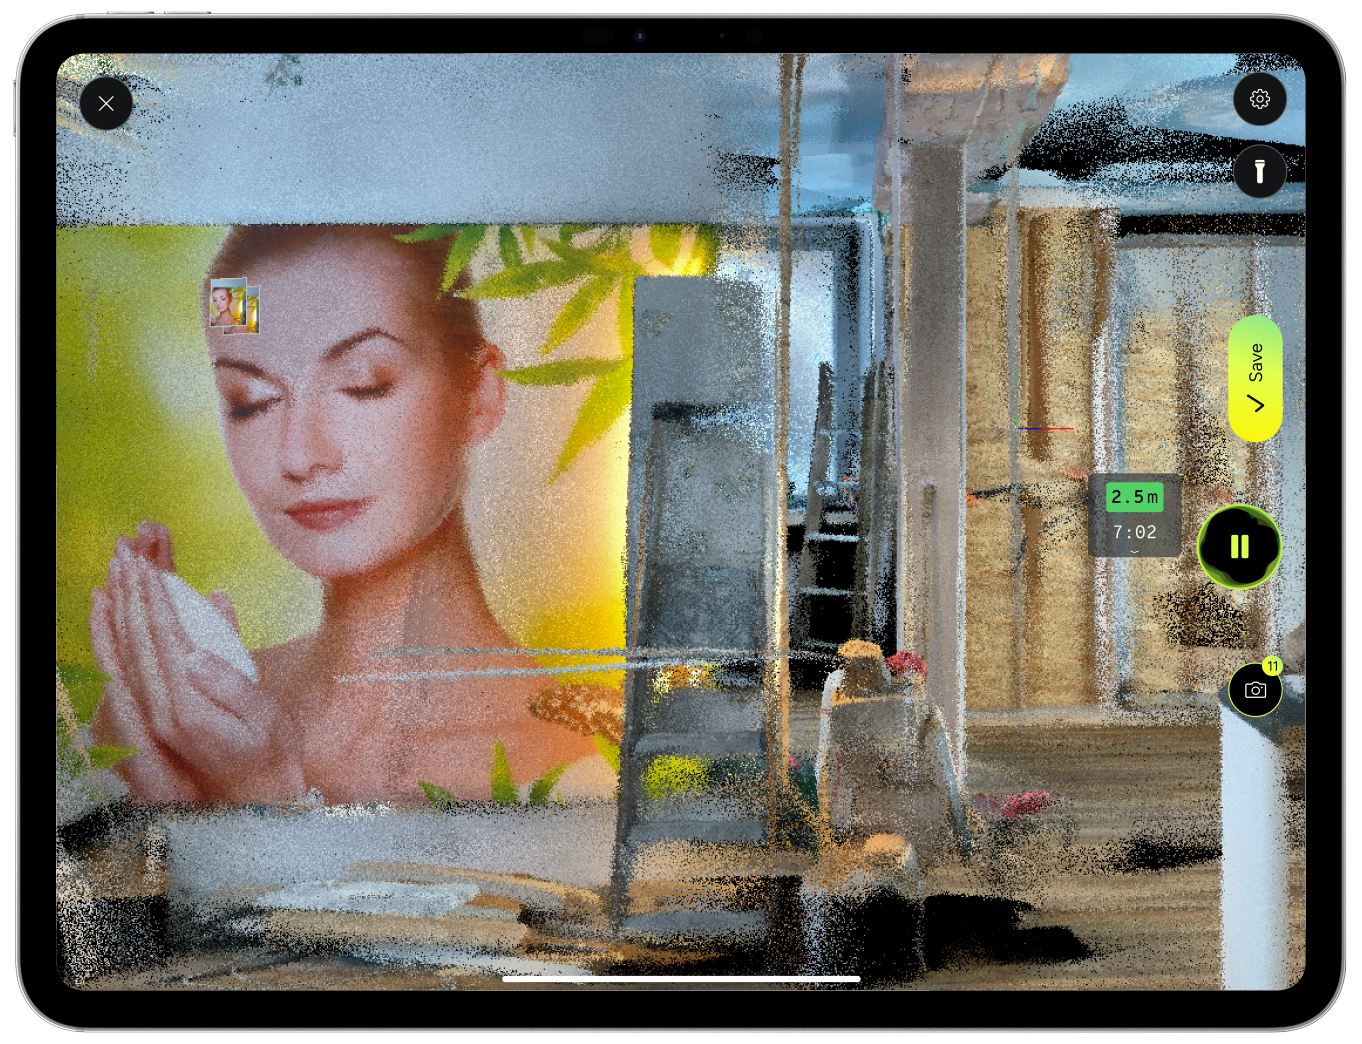
1. Capture the location with MAVO 3D
2. Connect via license key
Two ways to connect MAVO 3D to your Pointorama account. If you are new to Pointorama, register for a
free 14-day trial here.
Option A
Start in MAVO 3D then create a new API key in your Pointorama account with our MAVO 3D license key.
Option B
Copy the license key from the API page in your Pointorama account and enter in MAVO 3D
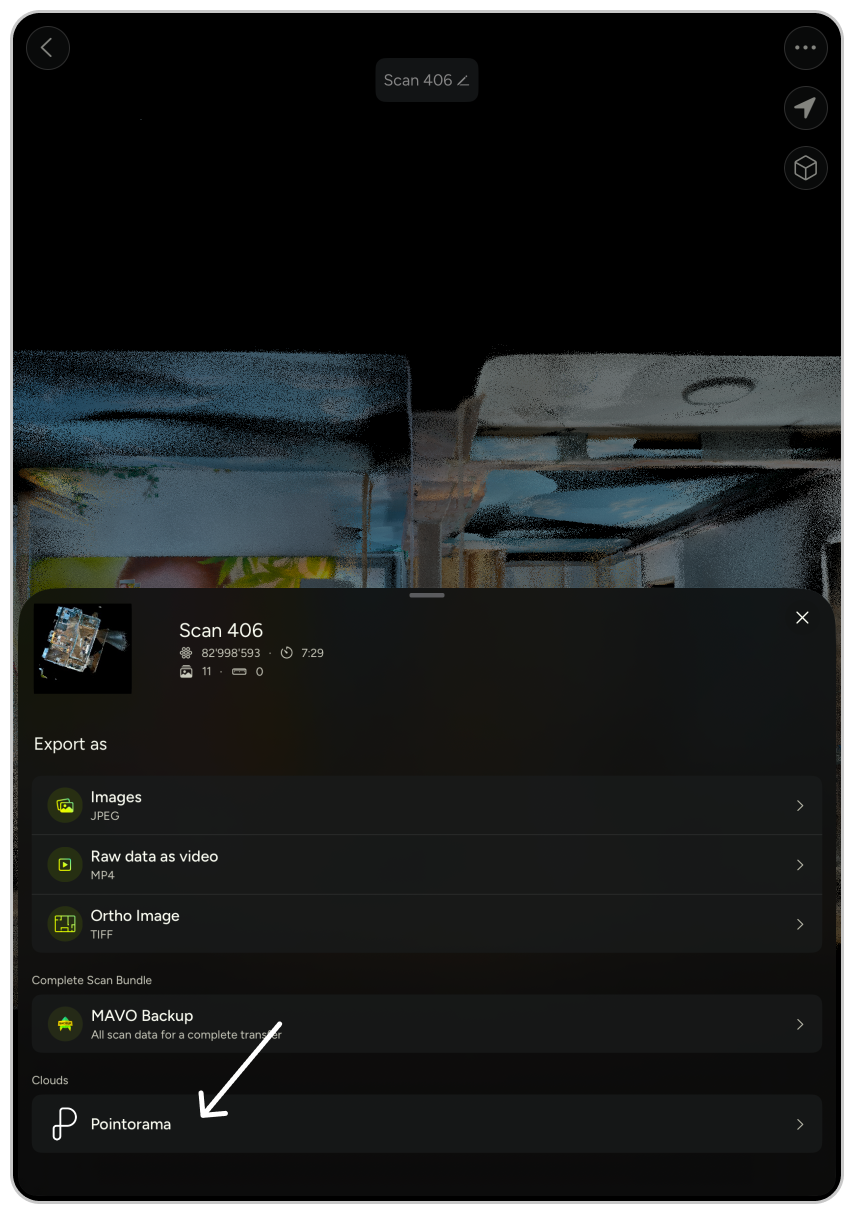
Upload and preparations
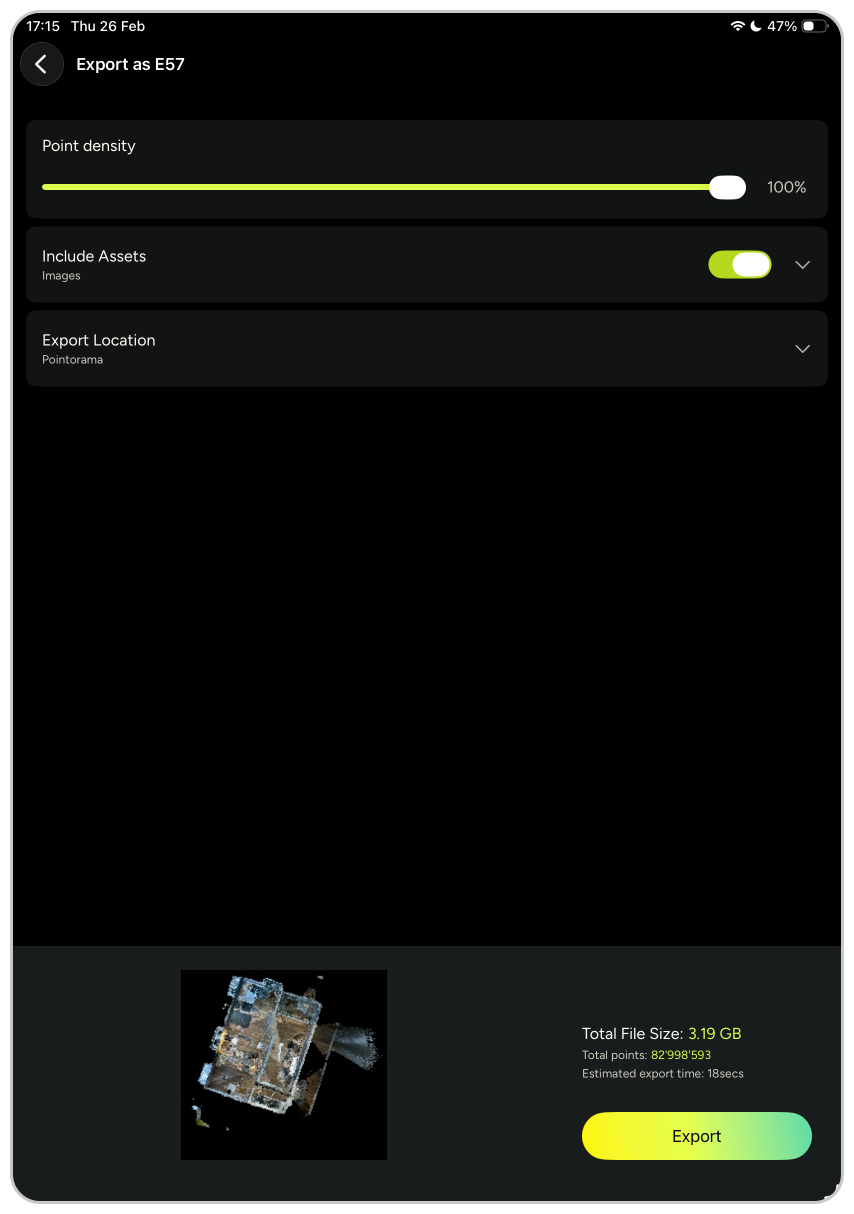
Export your scan as E57, PTS or LAS file and select Pointorama as the export location. MAVO 3D will handle the upload.
For an even quicker way, select Pointorama directly from the quick export section.
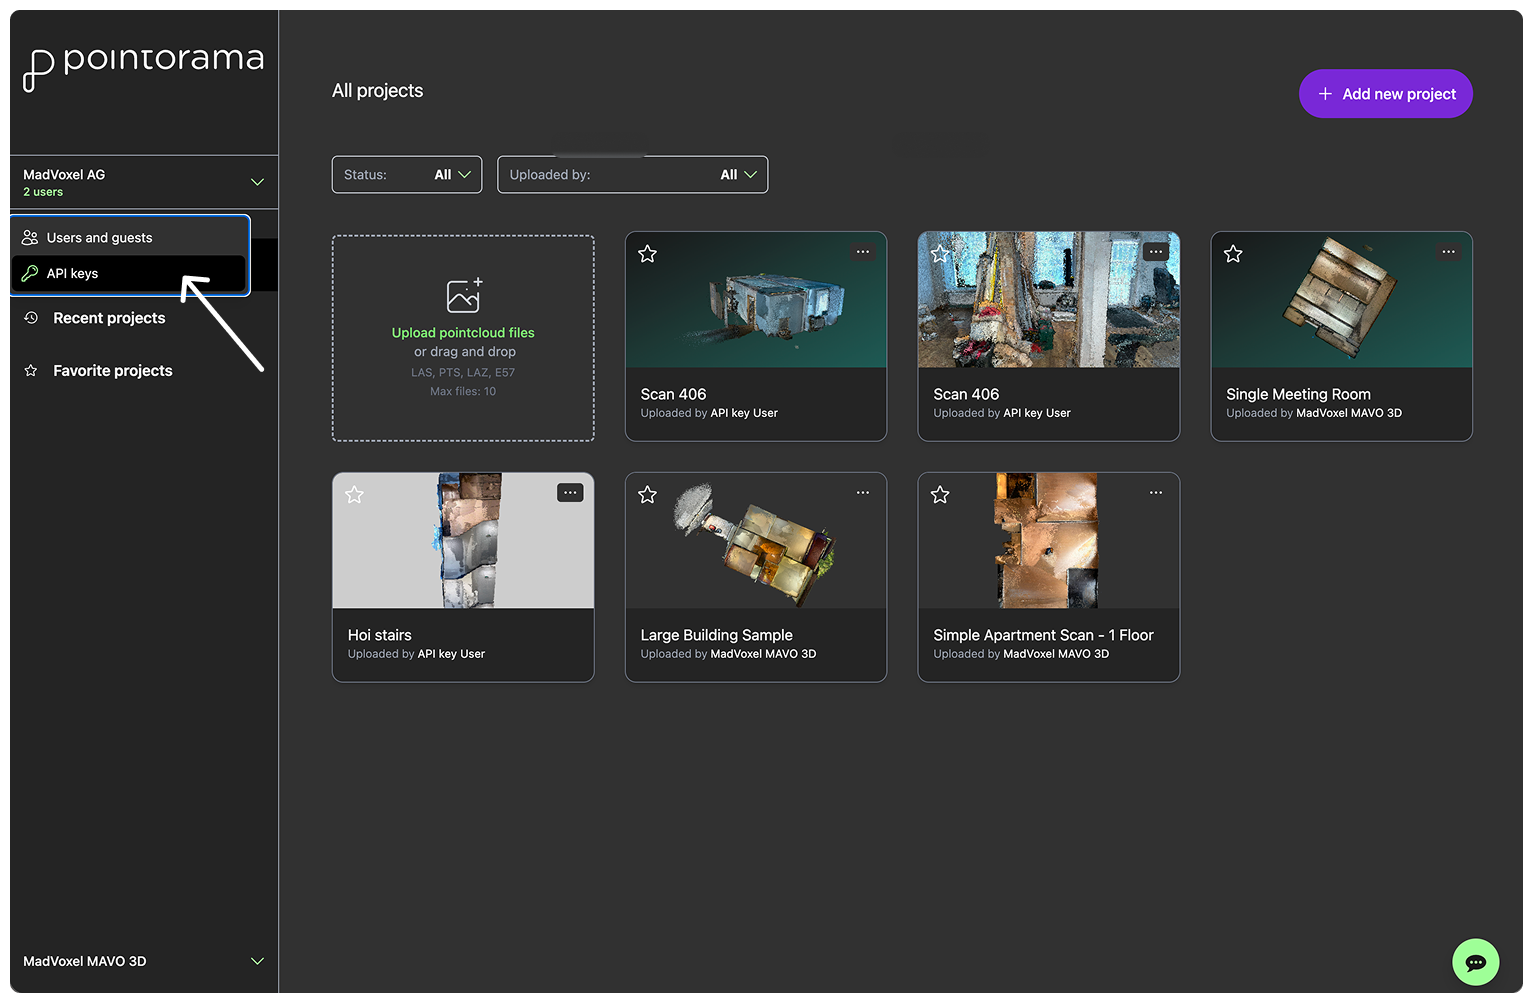
Info: all connected cloud accounts are shown in the export options menu. Wait for the upload and processing to complete. The scan will automatically appear in your Pointorama project overview.
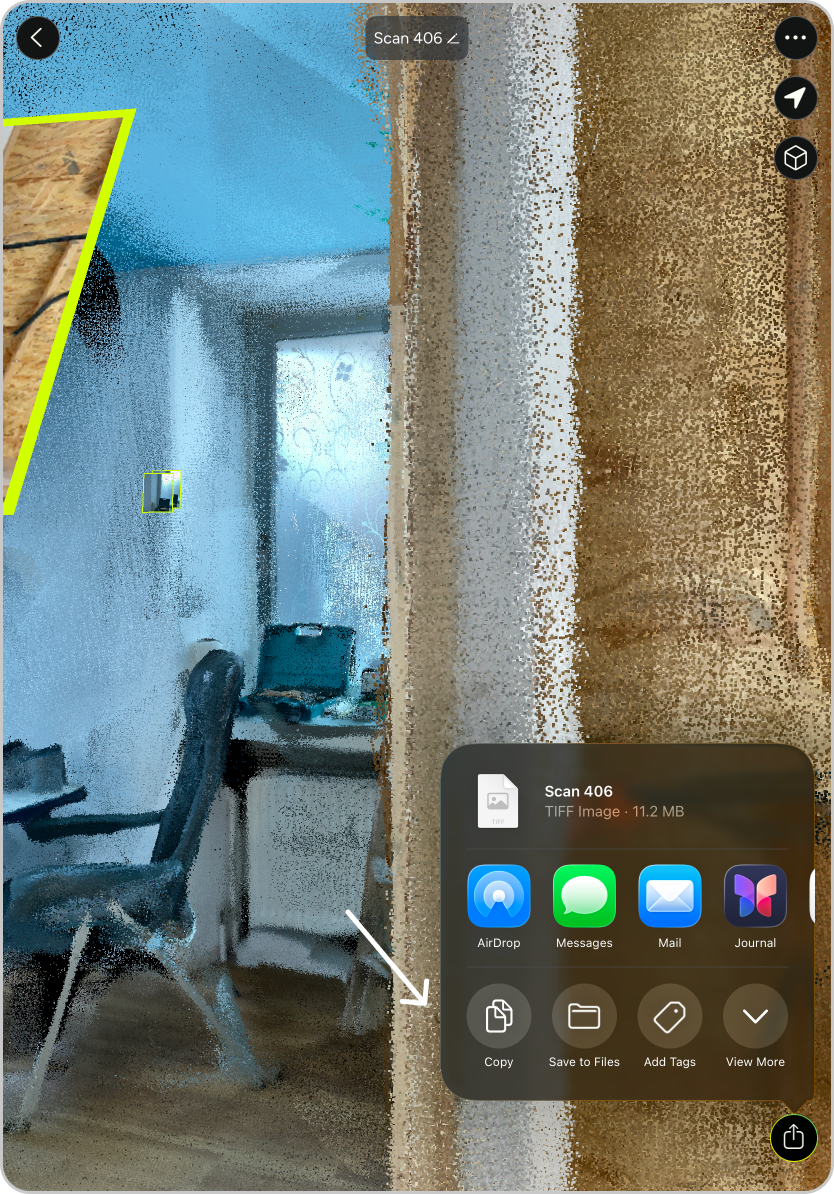
We recommend to take some control measurements before leaving the site. We have a handy export feature for this use case.
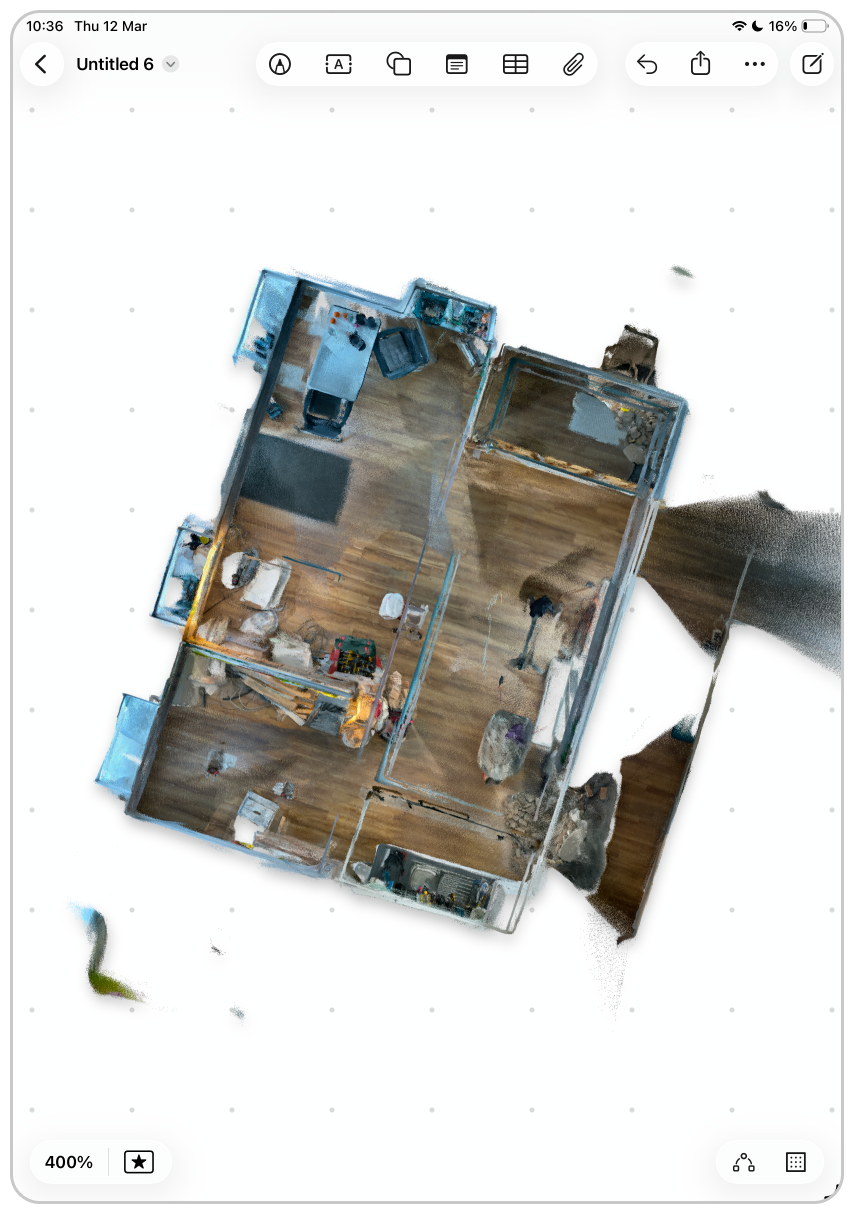
Export an automatically created “Ortho Image” directly from MAVO 3D and note down important measurements for reference later, see example we did on an iPad Pro.
3. Upload your scan to Pointorama
4. Export ortho image to note down control measurements
While on-site, it is recommended to take measurements for accuracy checks later.
Tip: Our users like to export ortho images directly from MAVO 3D to their iPads. You can also take screenshots from the viewer and note them down there, or use a different tool like pen and paper.
MAVO 3D ortho images are exported as high-resolution, lossless TIFF files and are fully true to scale.
Continue in Pointorama
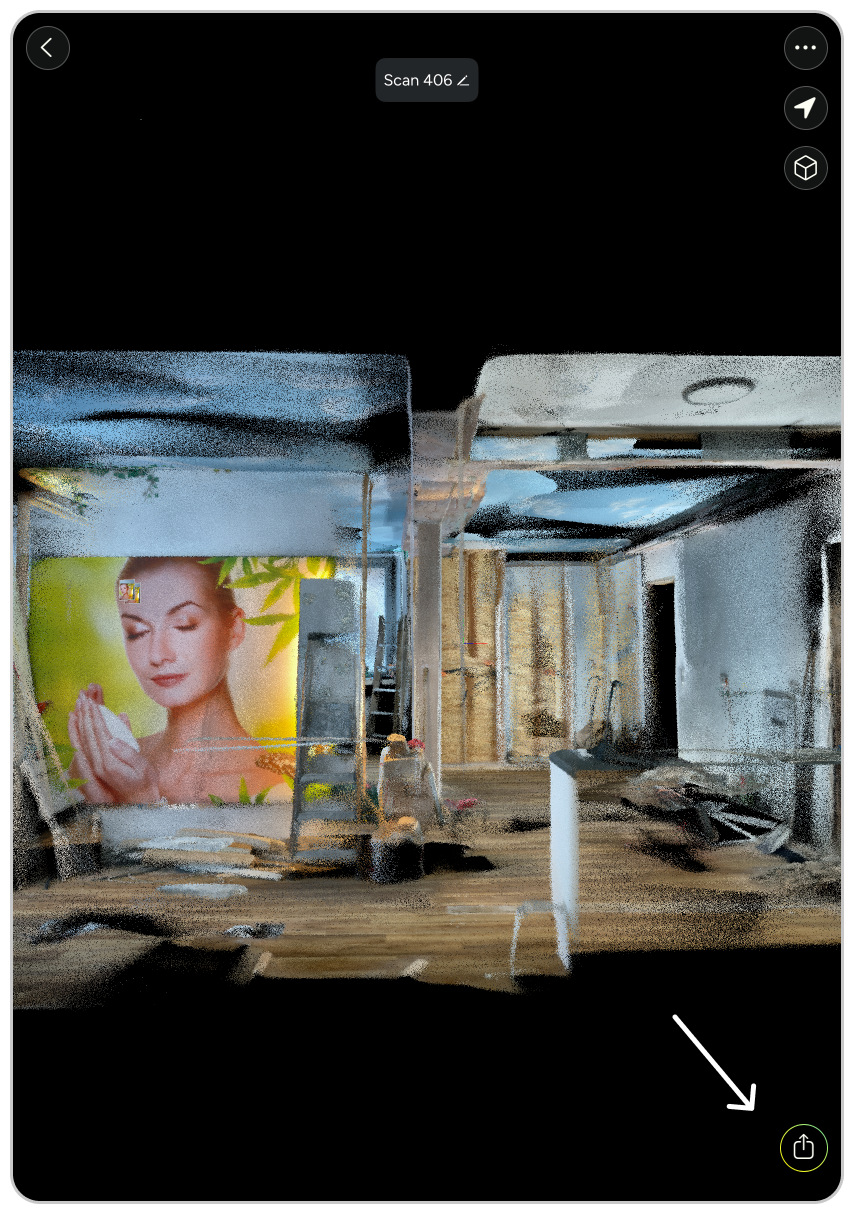
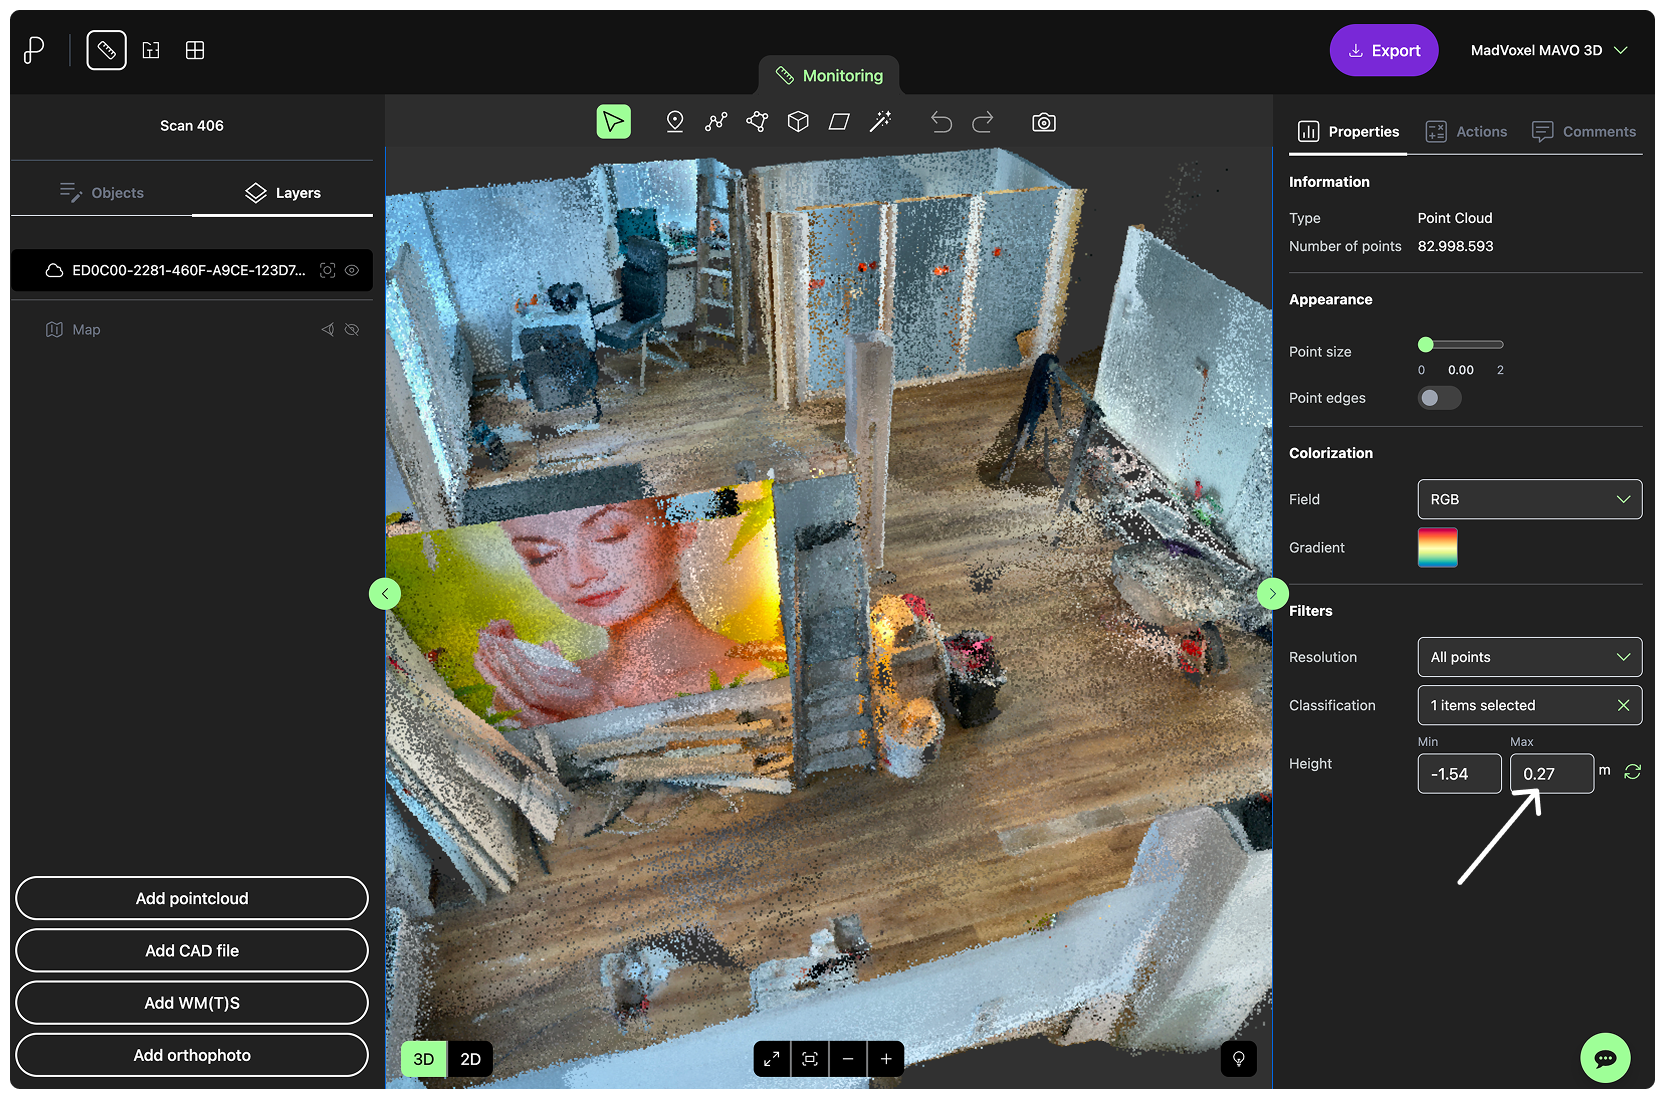
Some reconstruction work was necessary for this project. As you can see in the scans, some wall openings were created for additional water installations and new drywall was put up to convert the space into a residential area with the necessary amenities.
To create an updated floor plan, Pointorama offers a straightforward solution and assists you while drawing.
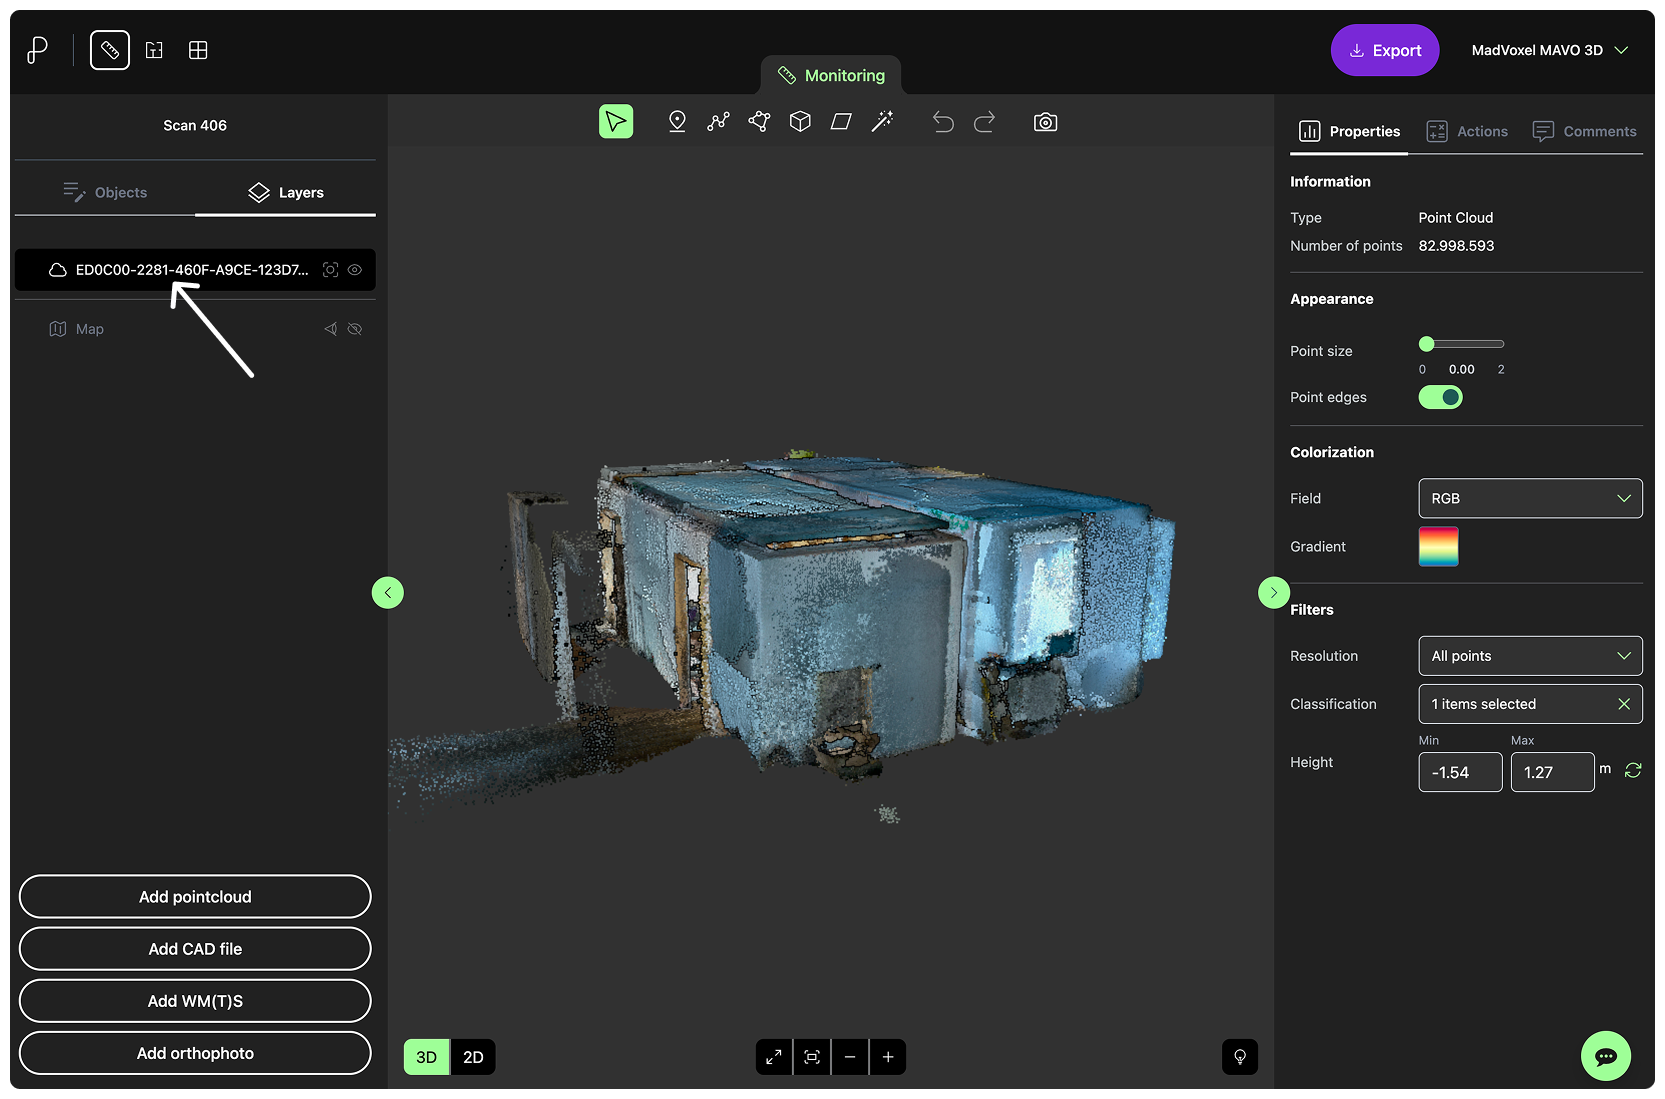
First, clipping the ceiling to get a clear view of the inside of the room. The installed overhead lights create unnecessary obstruction for creating the floor plans.
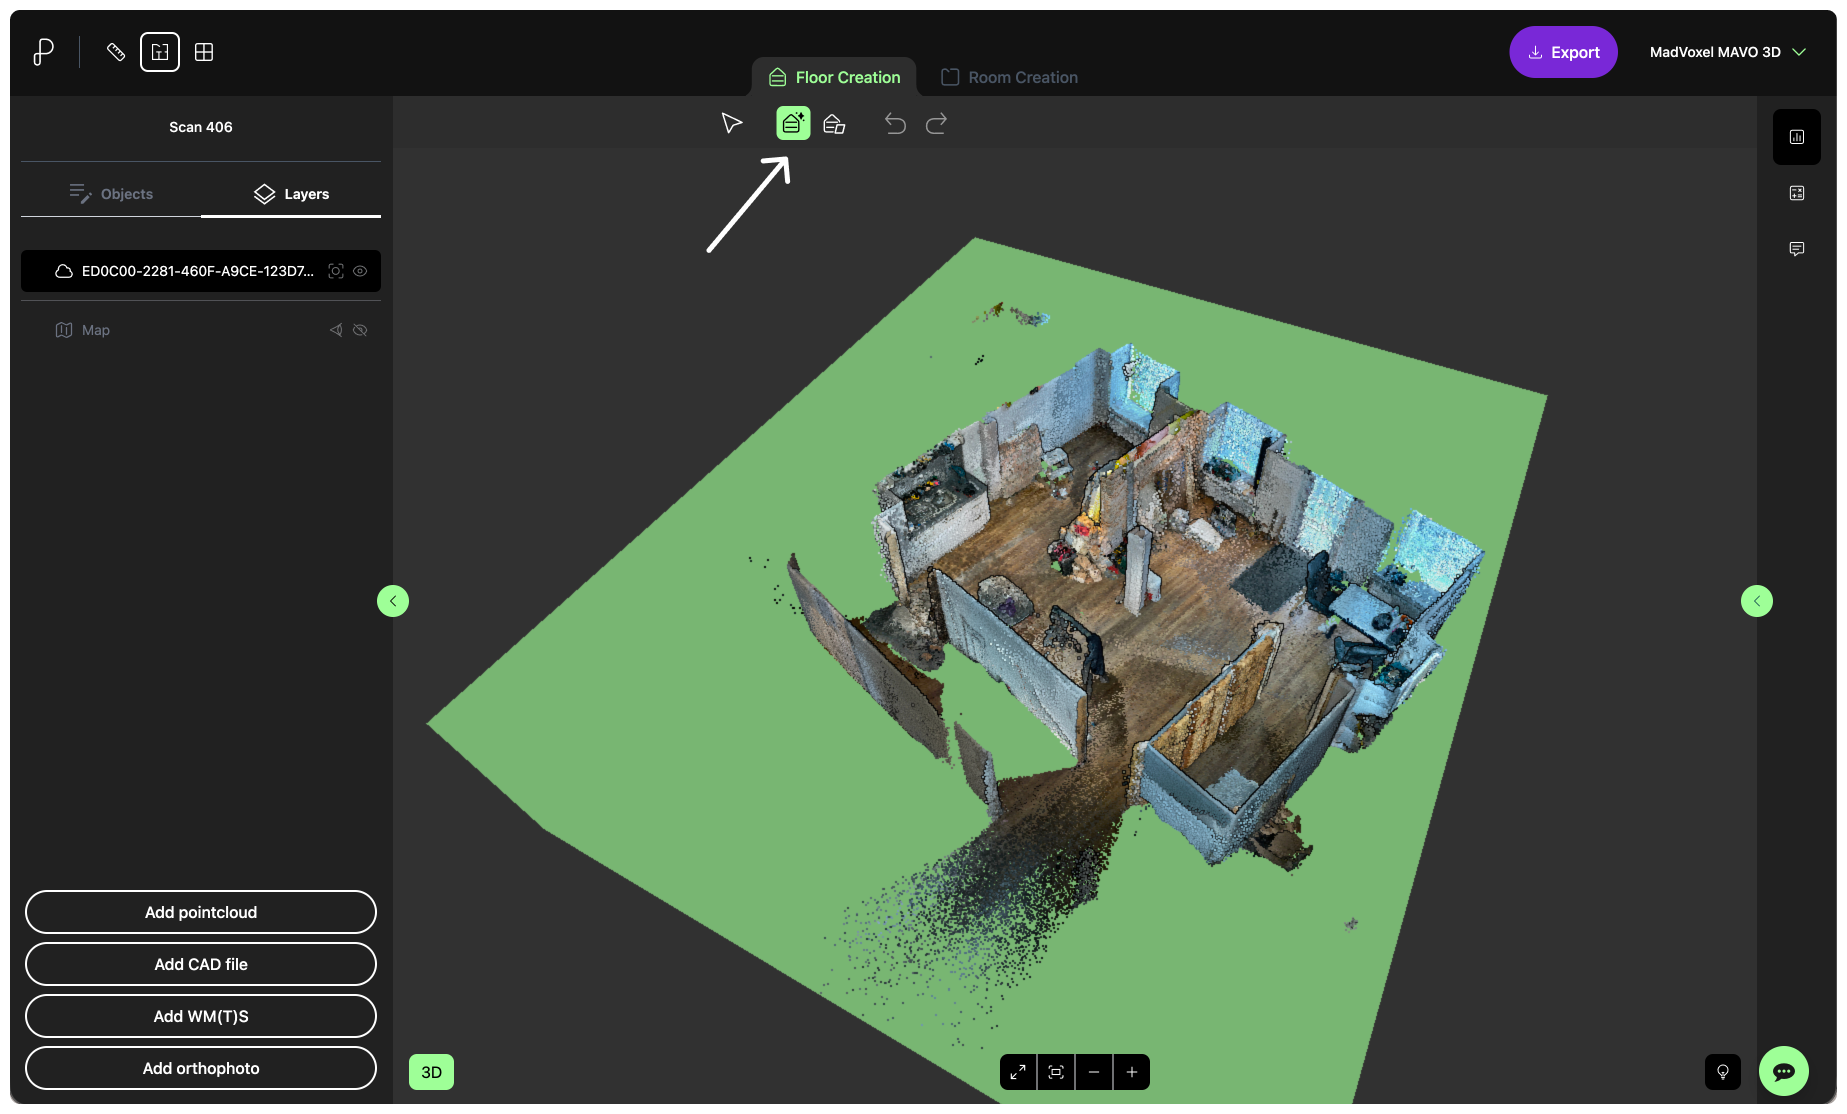
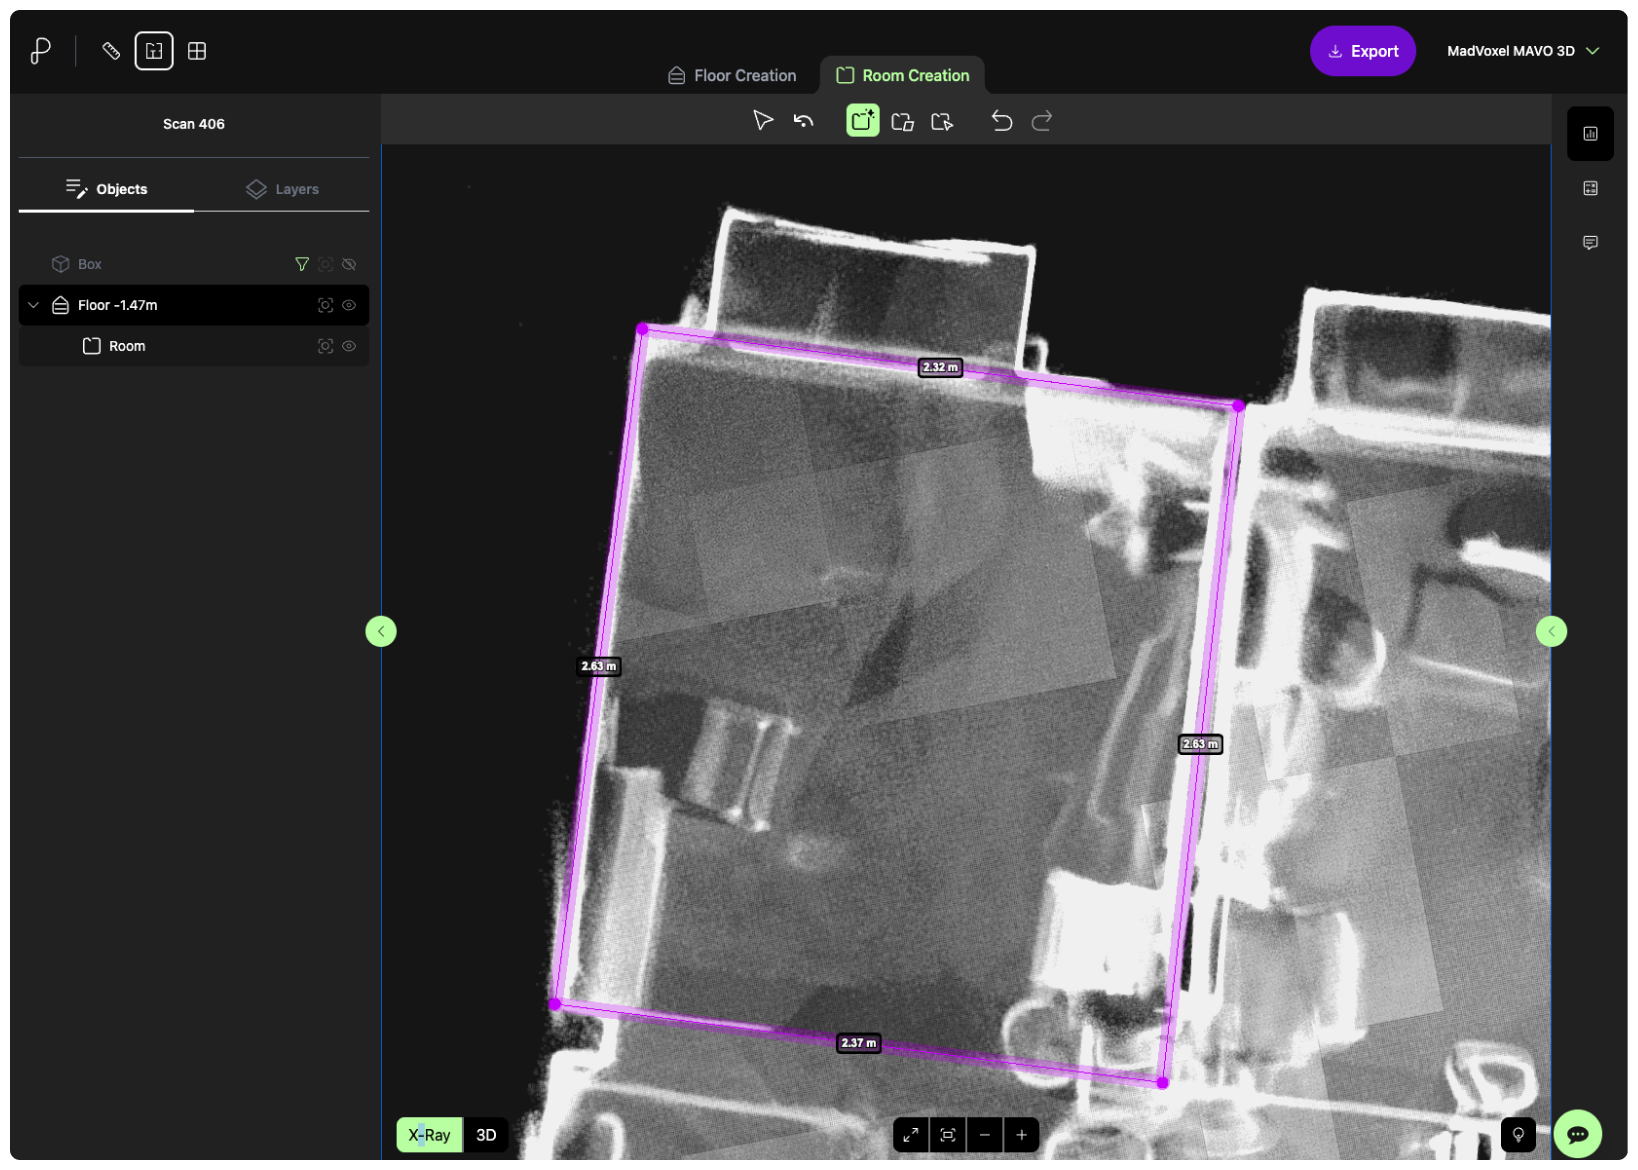
Moving on to floor plan creation. Pointorama must detect floors in the point cloud. Easy in this case as we have only one.
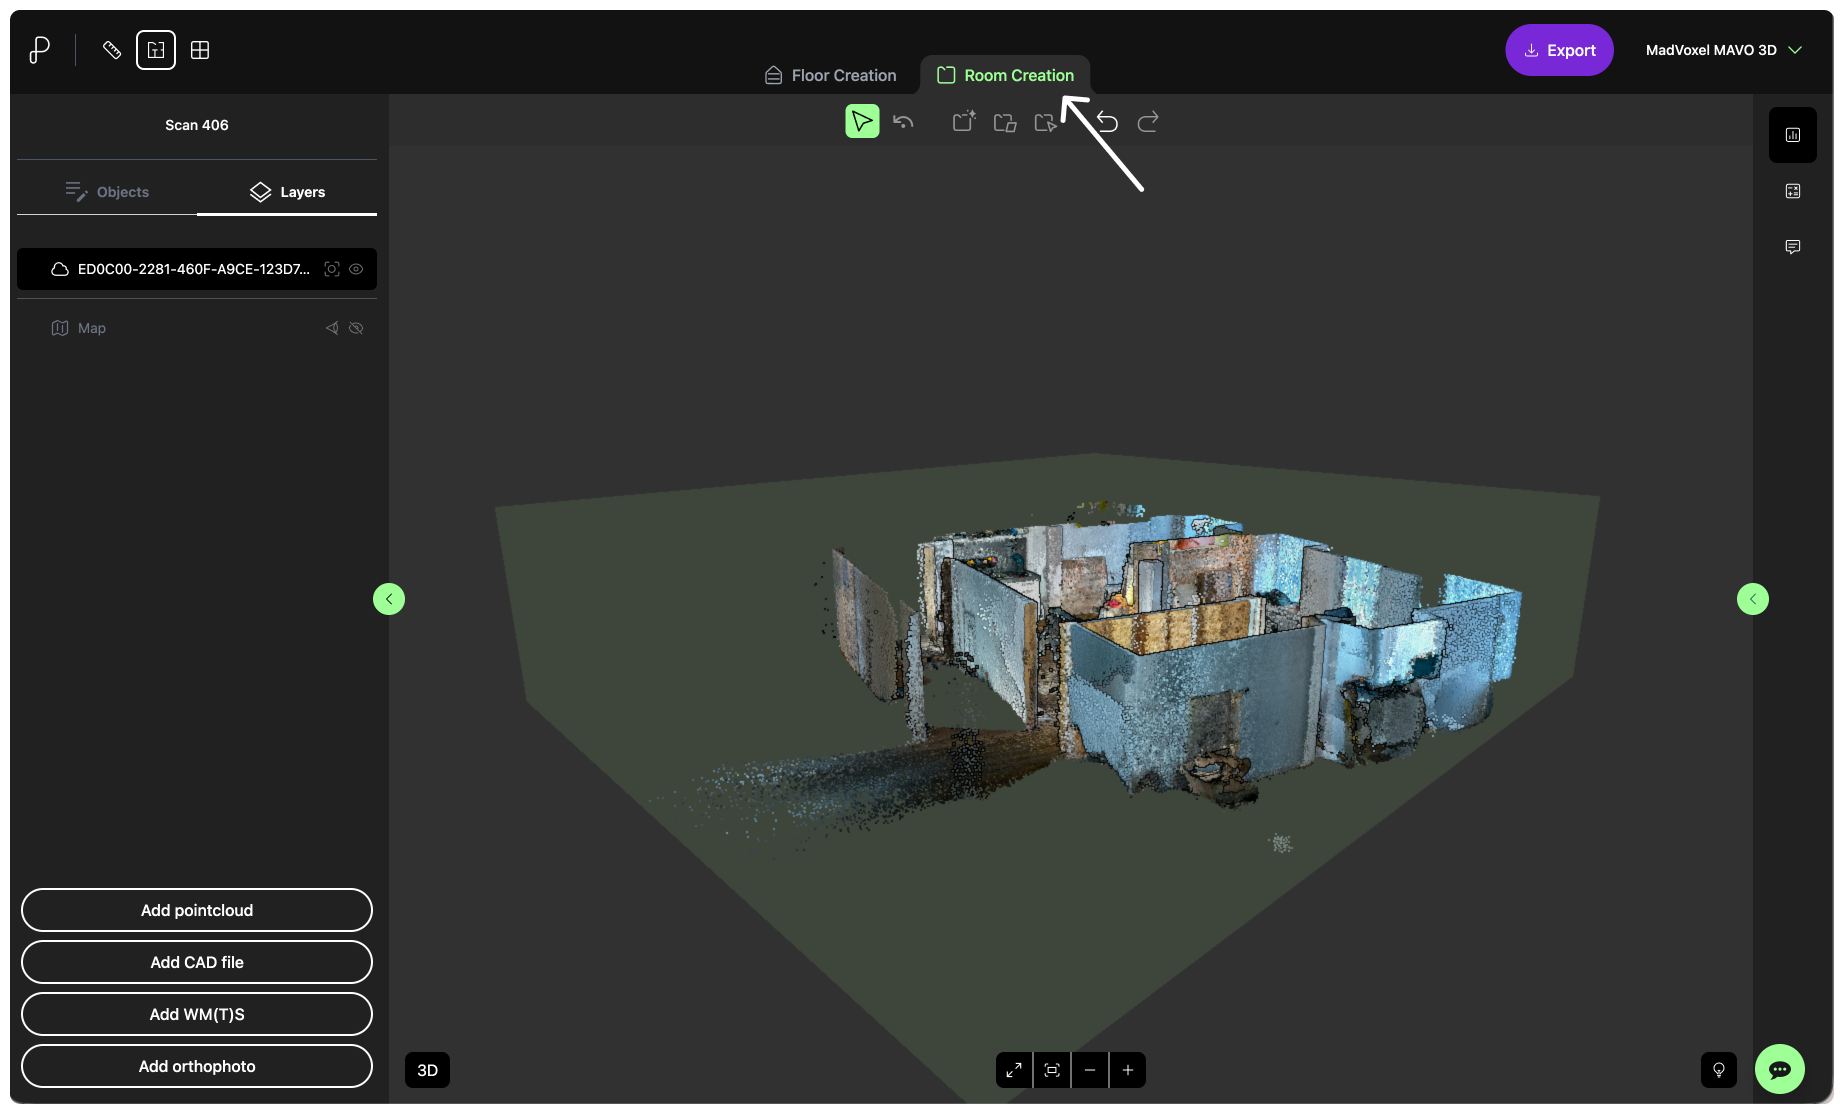
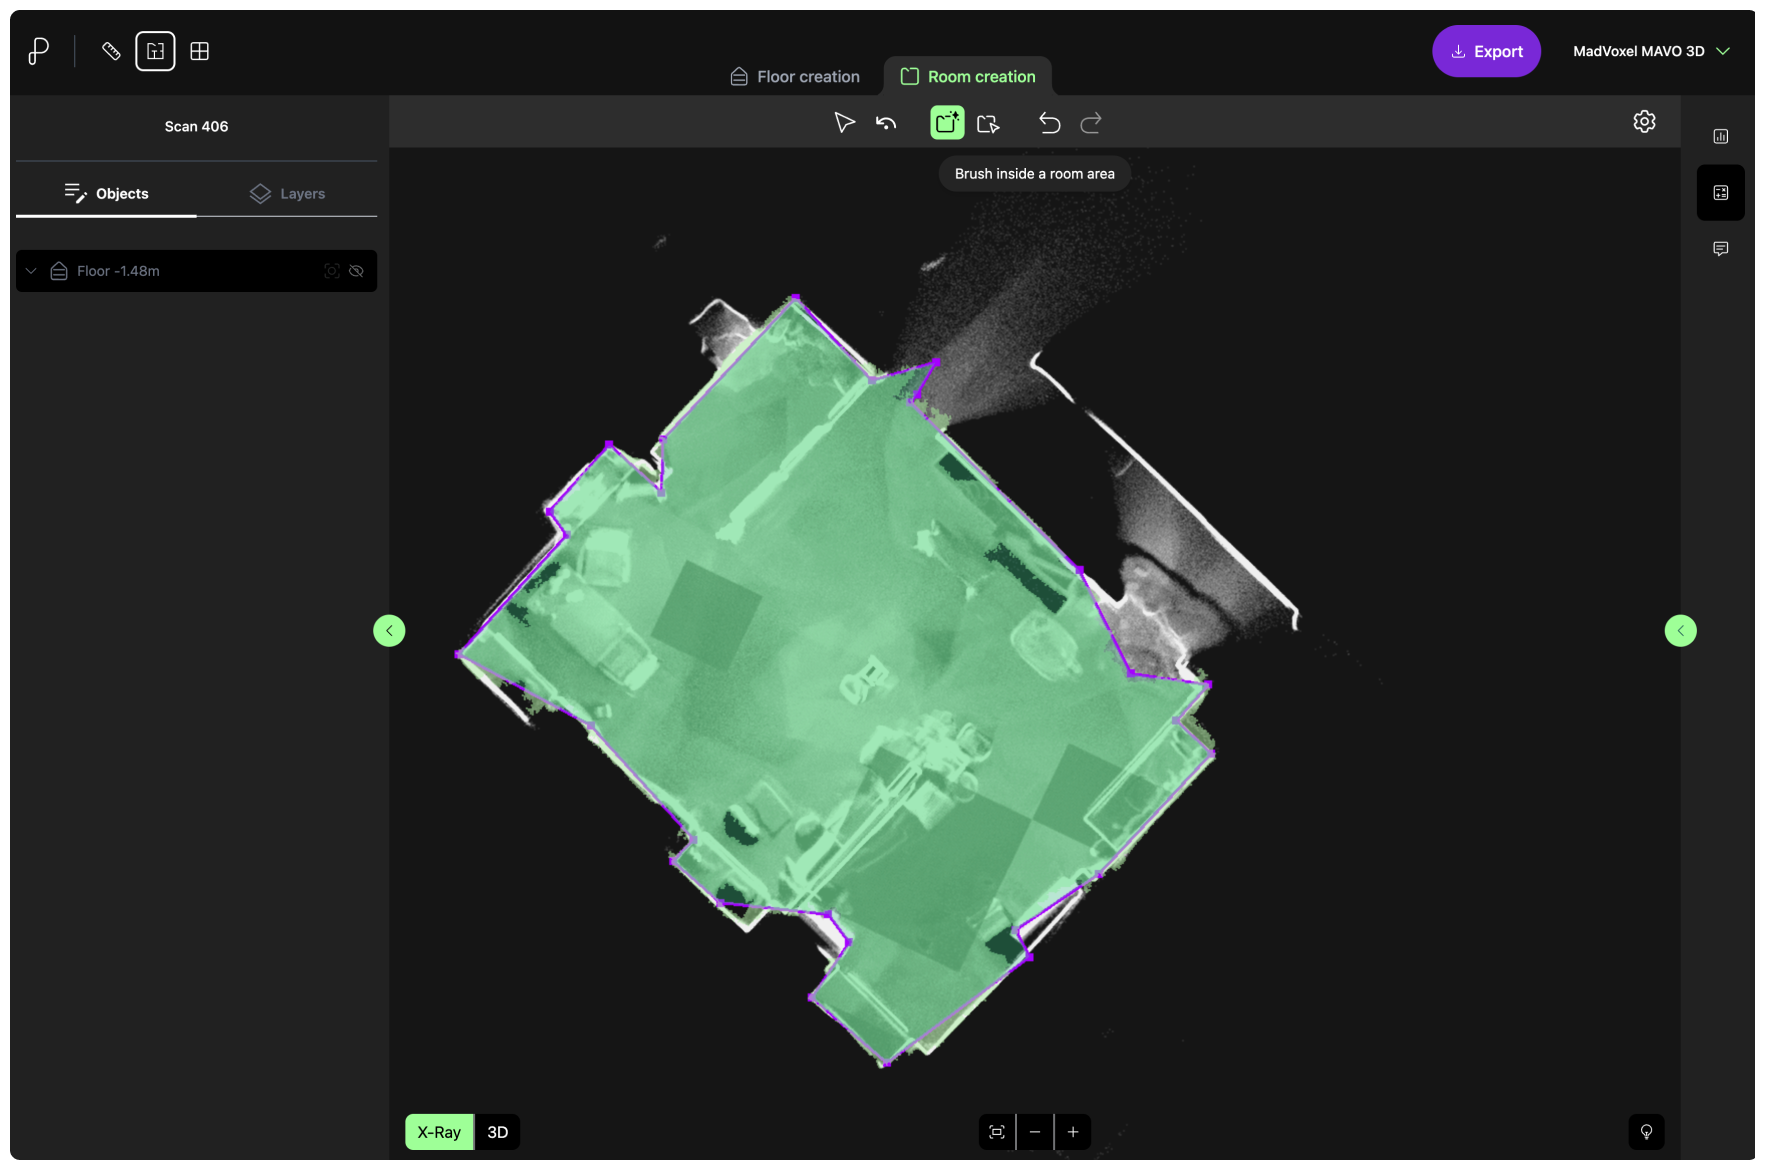
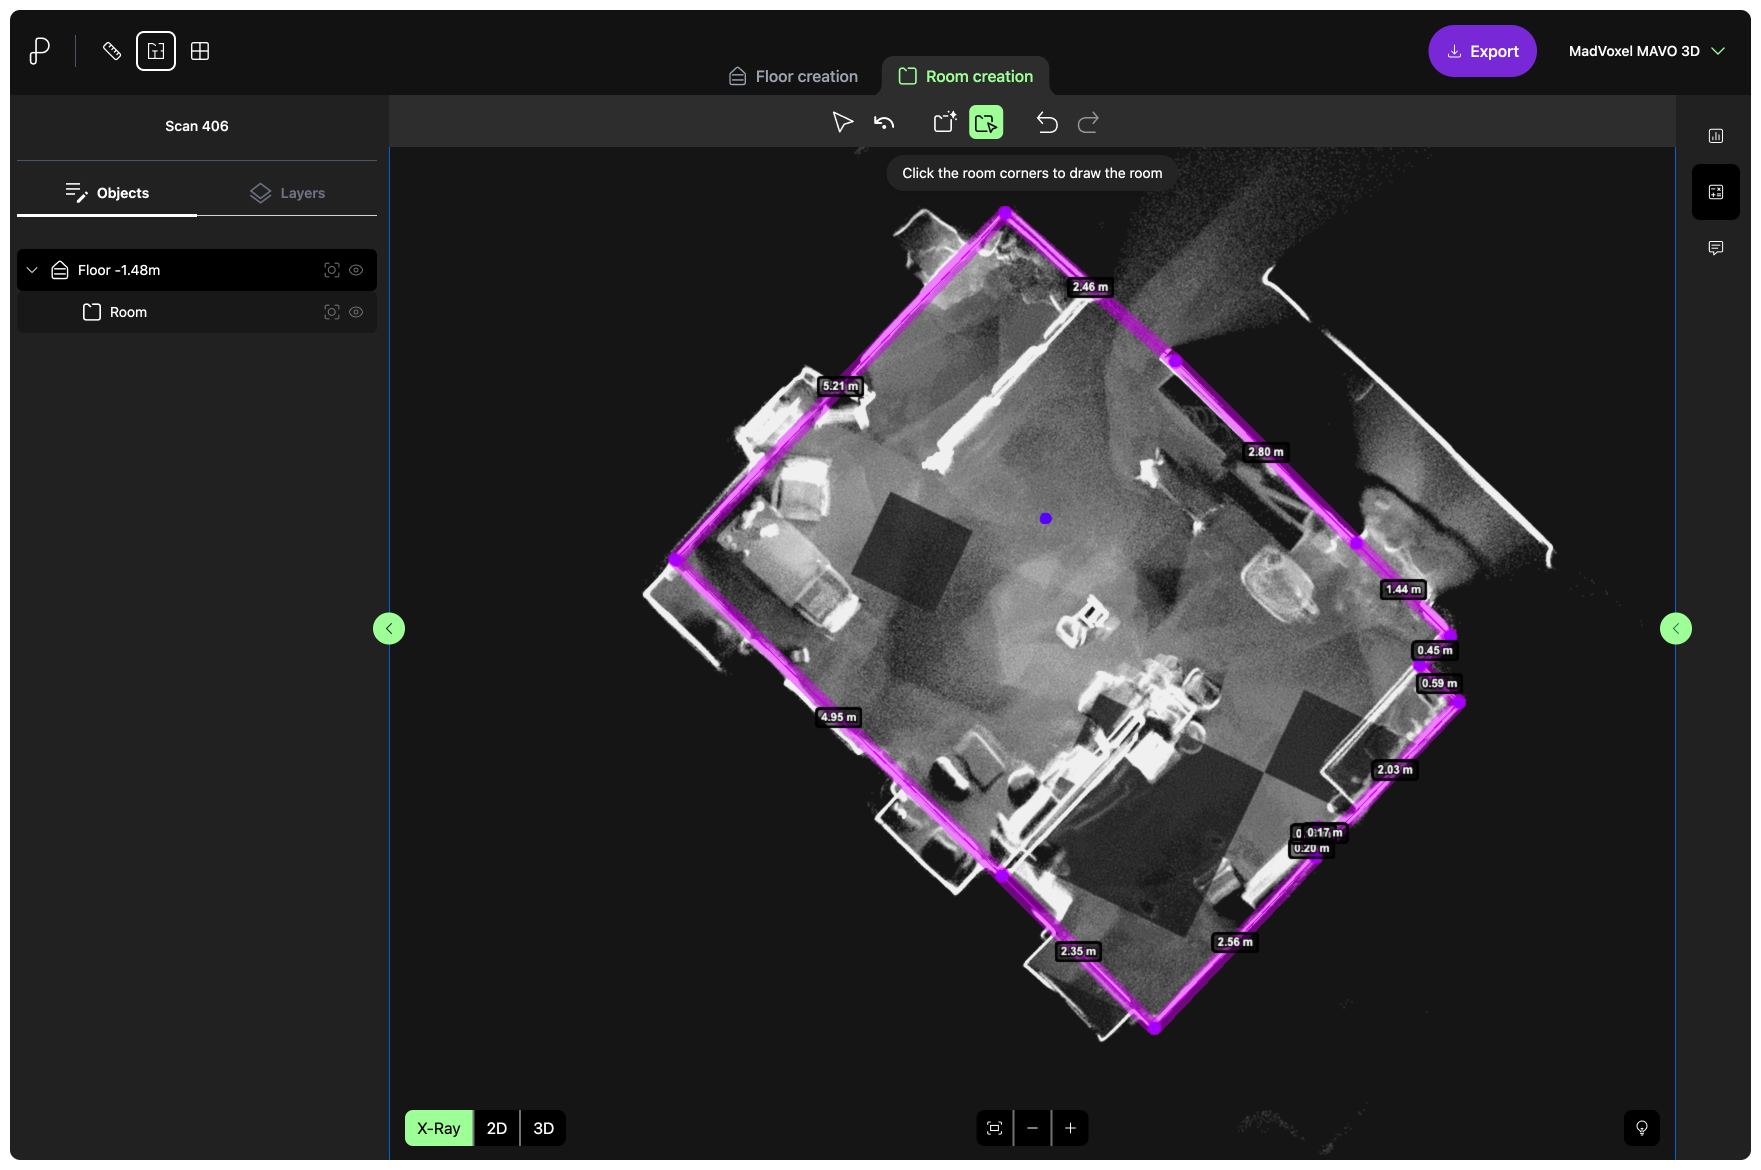
Start drawing. You can use smart drawing assistant, which helps with automatic room detection and makes suggestions that you can fine-adjust if needed, or you can draw fully manually.
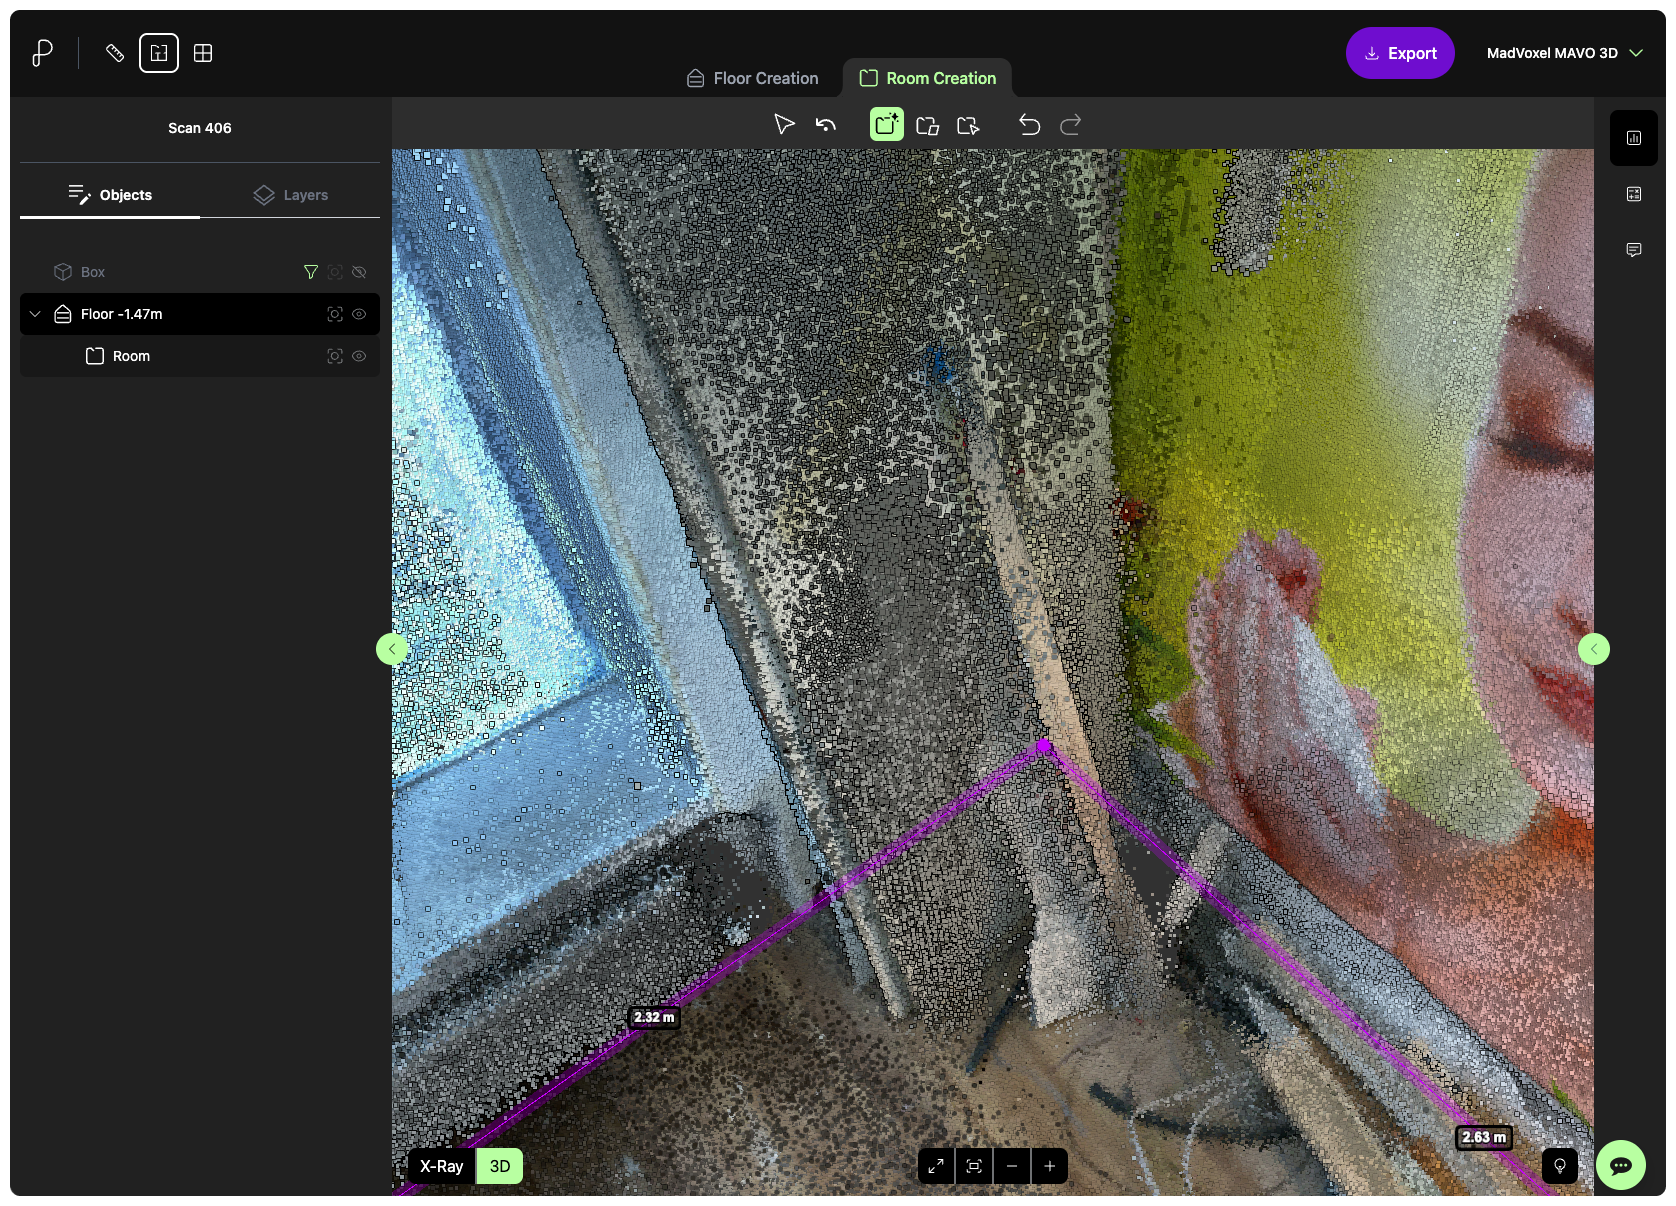
It’s easy to use and works in a similar way to a vector drawing tool. One handy feature is the ability to toggle between X-ray and 3D view. When we had some equipment leaning against the walls, switching to the 3D model helped us to quickly identify the walls amidst the clutter.
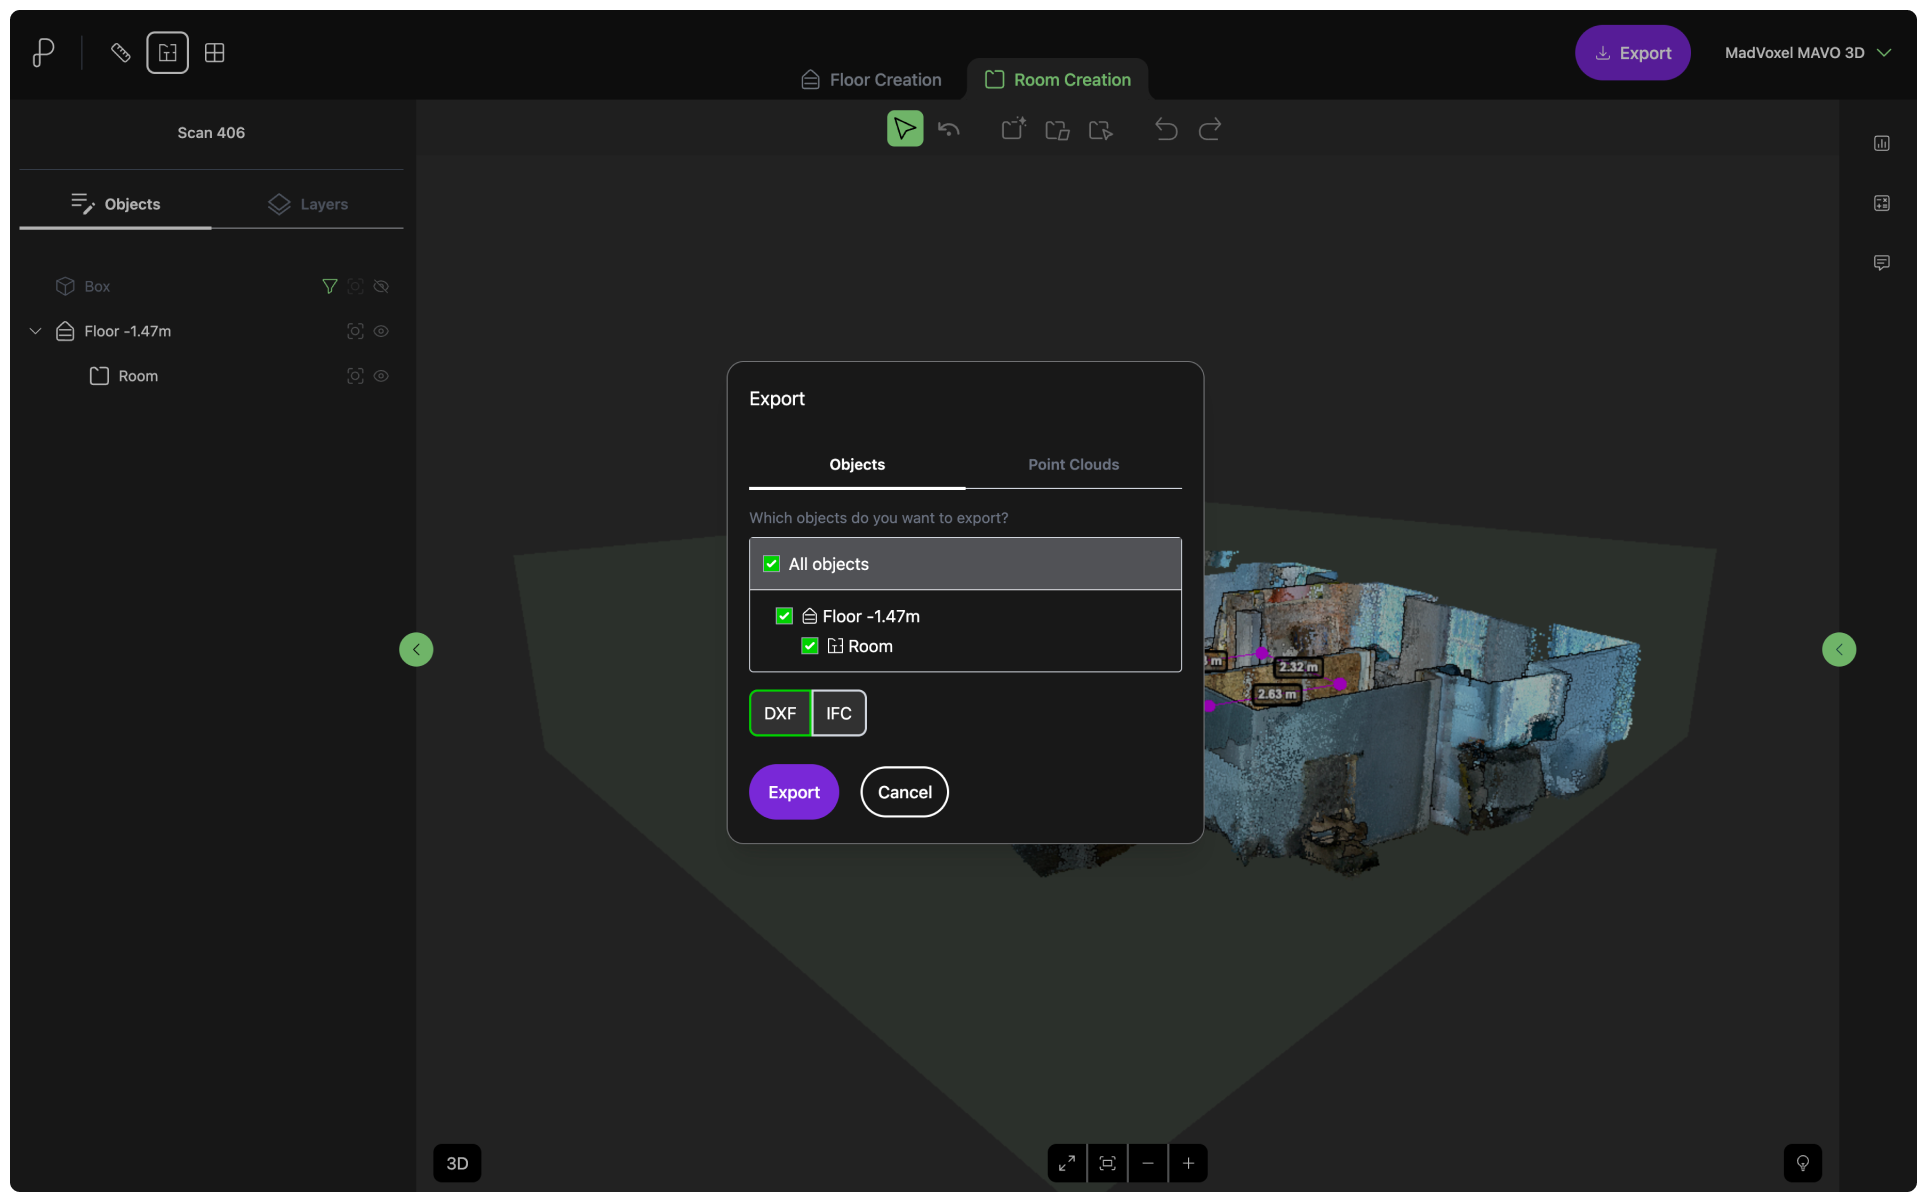
There you have it a fully drawn floor plan, ready to export as DXF or IFC file.
The ceiling height is clipped to provide a clear view of the interior of the room. The installed overhead lights are in the way when creating the floor plans.
6. Run automatic floor detection
Moving on to floor plan creation. Pointorama must detect floors in the point cloud first. Easy in this case as we have only one.
7. Start drawing
For this floor plan we needed a simple version without windows, so we excluded them from the measurements.
Same with the objects leaning against the wall, which obviously shall not be included in the plan, but are harder to detect in the X-Ray mode. Switching to 3D view for double checking.
8. Export your floor plan as DXF or IFC files
Start 3D scanning like a professional
Download MAVO 3D on the App Store and capture your first project today.
Testing this new Pointorama integration requires exporting your 3D scan project in E57, LAS or PTS. These formats are available in our Professional plan. Start your 7-day free trial to get access to these export options.
Try Pointorama
Register a new account and explore the integration with Pointorama’s 14-day free trial.
About Pointorama
Founded in 2011, and by now with over a decade of experience in the geospatial industry,
Pythagoras is a well-established CAD software company trusted by surveying professionals worldwide.
Their long-standing flagship product, Pythagoras CAD, has become an industry standard for precise calculations and high-quality plan creation, with proven integration across leading surveying equipment.
In 2024, they expanded their offering with
Pointorama, a SaaS platform for processing, visualizing, and sharing large point cloud datasets, designed to be accessible without costly hardware or software. We are proud to be partnering with Pythagoras to bring these solutions to our clients.
FAQ
Is MAVO 3D accurate enough for professional use?
Yes, MAVO 3D uses the LiDAR sensor built into iPhone Pro and iPad Pro to deliver cm-range accuracy on site. It’s used by architects, surveyors, and construction professionals for as-built documentation, floor plan creation, and site verification. Workflows that rely on precise results.
Can I create floor plans from iPhone LiDAR scans?
Yes, with the integration to Pointorama, you can create accurate floor plans from your 3D scans. Scan the space on site with your iPhone Pro or iPad Pro, export the point cloud to Pointorama, and use their assisted drawing tools to produce accurate floor plans in the browser. No CAD expertise required.
What's the difference between MAVO 3D and a traditional laser scanner?
Dedicated scanners from Leica, NavVis, Trimble, Faro and others are built for survey-grade precision, but they also require significant investment, specialist operators and lenghty setup times.
Powered by our own
MAVO Core algorithm, we process sensor and camera data in a way that makes MAVO 3D the only iPhone Pro and iPad Pro LiDAR app capable of scanning across a broad range of environments and scan sizes. We also apply loop closure methods to clean up your point cloud after scanning. Which is by the way, the biggest technical challenge for SLAM-based mobile solutions on the market, including those from established players.
Our MAVO 3D users capture detailed interior rooms, multi-storey buildings, exterior facades and outdoor construction sites. Use cases include as-built doucmentation, floor plan creation and volume calculations in the field.
Where dedicated scanners are the right call for the highest-precision survey work, MAVO 3D closes the gap for professionals who need fast, reliable, and flexible 3D capture without specialist hardware.
Which iPhone and iPad models are compatible with MAVO 3D?
MAVO 3D requires a LiDAR-equipped device: iPhone: 12/13/14/15/16/17 Pro & Pro Max
iPad Pro: Starting with the 2020 model & all M-series iPad Pros (M1, M2, M4, M5).
These models include Apple’s LiDAR sensor, a light-based depth measuring sensor that MAVO 3D uses to capture and process high-accuracy 3D point clouds.
Why LiDAR data and not Gaussian Splatting or Photogrammetry?
LiDAR is a direct measurement technology. It captures real-world geometry by emitting laser pulses and measuring their return time, producing data that is inherently true to scale and dimensionally reliable without additional calibration or processing steps.
Photogrammetry and Gaussian Splatting work by capturing hundreds or thousands of overlapping images that need to be processed and reconstructed afterwards. This creates heavy datasets and significant post-processing overhead. A real constraint when working on large-scale projects where scan size and turnaround time matter.
LiDAR produces comparatively lean, point cloud data that scales well to larger environments and outputs directly in E57 or LAS, industry-standard formats your professional software already accepts, with no conversion step needed.
How long does it take to 3D scan a room with MAVO 3D?
You can calculate with approximately 1min scan time / 8m2. Of course, the more features or elements to move around, the longer it will take.
Should I keep a local backup of my scans?
If you want to reprocess or upsample your scan later, save a MAVOB (MAVO Backup) file locally or to some other file storage online, such as
Nextcloud. This preserves all RAW data for future use.